
Propagation
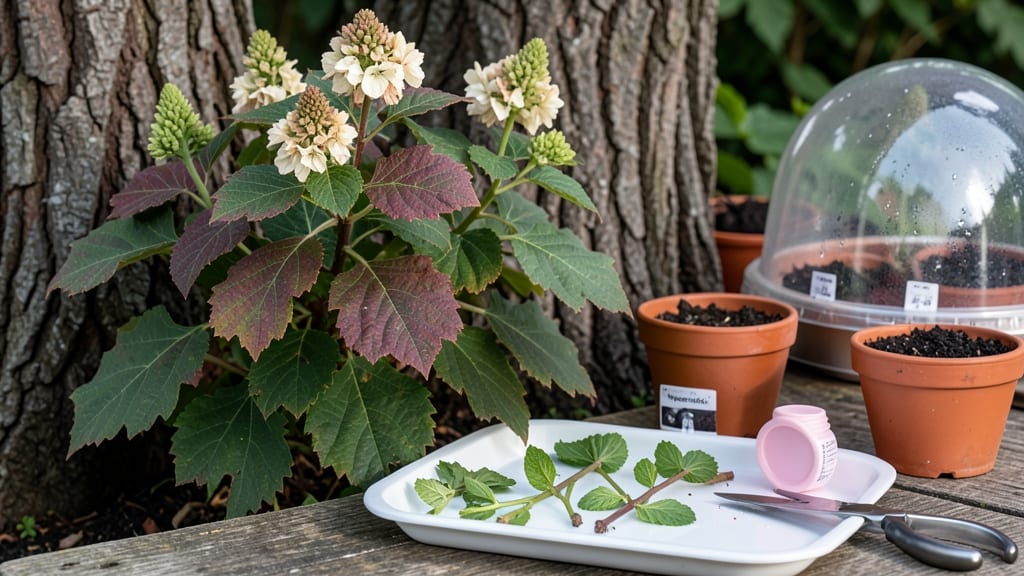
Propagate an oak leaf hydrangea by layering one bush into three without buying a single plant. ✨ The secret lies in summer propagation—when stems are still flexible but not flowering—so you get bushier growth and more blooms next year. I’ve doubled my plants using this method, and the best part? No green thumb required. You’ll need sharp pruners, rooting hormone (optional but helpful), and a small pot or tray. The process takes about 6-8 weeks from layering to transplanting, and the key is keeping the soil consistently moist—not soggy. I learned the hard way that overwatering smothers new roots, while underwatering stalls growth. By fall, you’ll have 3-5 new plants ready to replant, each with the same stunning oak-shaped leaves and fragrant blooms. The first year might be slower, but patience pays off with stronger, more established hydrangeas by spring. Works for both ground layering and air layering—pick the method that fits your space. Let’s get those stems rooting!
📚 In This Guide
- What you need
- Instructions
- Tips and common mistakes
- Wrapping up and next steps
What you need
- ● Healthy oak leaf hydrangea plant – Choose a mature plant (at least 2–3 years old) with flexible, semi-woody stems.
- ● Sharp pruning shears or bypass pruners – Sterilized to prevent disease (70% isopropyl alcohol works great!).
- ● Rooting hormone – A gel or powder (like Clonex or Rootone) to boost root growth.
- ● Plastic wrap or clear plastic bags – 1–2 large sheets or bags (6"–12" wide) to create a humid environment.
- ● Twist ties or rubber bands – To secure the plastic wrap around stems.
- ● Well-draining potting mix – A blend of peat moss, perlite, and sand (or a pre-mixed propagation mix).
- ● Small pots or trays – 4"–6" pots with drainage holes for young cuttings.
- ● Watering can or spray bottle – For gentle hydration (avoid soaking the mix!).
- ● Garden gloves – To protect your hands from thorns and sap.
- ● Hormone-free alternative – Cinnamon powder or willow water (natural rooting aids).
- ○ Heat mat (optional) – A bottom heat mat (70–75°F) speeds up rooting in cooler climates.
- ● Humidity dome or propagation box – Keeps moisture levels high without plastic wrap.
- ● Label markers – To track propagation dates and varieties.
- ● Fertilizer (low-nitrogen, 5-10-5) – For post-rooting care (apply lightly after 4–6 weeks).
Step-by-Step instructions for propagating oak leaf hydrangea
Layering is the easiest way to multiply your oak leaf hydrangea—no fancy tools, just patience and a little know-how.
🌿 Step 1: Choose Healthy Stems for Layering
Pick last year’s wooden stems (not the current year’s green growth) that are about ¼-inch thick and have at least 3-4 leaves. These mature stems root best because they’ve already stored energy. Look for stems that bend easily without snapping—they’re flexible enough to anchor without breaking.
I avoid stems with flowers or buds since they’ll focus energy on blooming instead of rooting. The best candidates are the ones growing outward from the center of the plant, where they’ll have good access to moisture from the parent plant. Use clean, sharp pruners to make a 45-degree angle cut just above a leaf node (the bump where leaves attach).
🌱 Step 2: Create the Layer and Secure It
Gently bend one of your selected stems toward the ground until it forms a gentle curve. You’ll want the middle section (about 6-8 inches from the tip) to touch the soil. Make a small slit in the stem with a clean knife—about ½-inch long—to expose the inner pith (white tissue). This encourages roots to form.
Use a small U-shaped wire or a bent piece of coat hanger to hold the stem in place against the soil. Cover the slit with moist potting mix (not garden soil) and press lightly so it stays in contact with the stem. The goal is to keep the slit buried while leaving the tip of the stem exposed to light. Water gently to settle the soil around the slit.
💧 Step 3: Maintain Moisture and Wait for Roots
Keep the soil around the layered stem consistently moist but not soggy—think of a wrung-out sponge. I water lightly every 2-3 days and check by sticking my finger 1 inch deep into the soil. If it feels dry, it’s time to water. Too much water will rot the stem before roots form.
In about 4-8 weeks, you’ll see new growth at the tip of the stem and feel slight resistance when you wiggle the layered section. That’s your sign roots are forming! I test by gently tugging—if the stem doesn’t pop out easily, roots have taken hold. If it resists but doesn’t feel firmly anchored, wait another week.
✂️ Step 4: Separate and Plant the New Hydrangea
Once roots are confirmed, use clean pruners to cut the stem just below the new root growth. Dig carefully to avoid damaging the roots—oak leaf hydrangeas are sensitive to root disturbance. Handle the new plant by its leaves (not the stem) to prevent crushing.
Plant your new cutting in a pot with well-draining potting mix or directly in the garden in a spot with partial shade. Water deeply to help it settle in, and keep the soil moist for the first 2 weeks while it establishes. You’ll know it’s thriving when you see fresh new leaves within a month.
☀️ Step 5: Care for Your New Plants Through First Season
Your propagated hydrangeas need morning sun and afternoon shade to prevent leaf scorch. I place them where they get 3-4 hours of direct sun daily, especially in hotter months. Mulch around the base with 2-3 inches of organic mulch to retain moisture and regulate soil temperature.
Fertilize lightly in spring with a balanced, slow-release fertilizer (10-10-10) to encourage bushy growth. Avoid heavy feeding—they’ll focus on leaves instead of establishing strong roots. By next year, your new plants will be ready to bloom just like their parent!
Tips & tricks for propagating oak leaf hydrangea
Here's what nobody tells you about layering hydrangeas—these tricks will make all the difference between success and frustration.
Stem Selection Secret: In Step 1, focus on stems that are about ¼-inch thick and have 3-4 mature leaves. I always look for ones that bend like a bow—not too stiff, not too floppy. These stems have stored enough energy to root successfully, while thinner ones won't have enough reserves. Confession: I skipped this step for years and wondered why my cuttings kept failing!
Slit Technique: When making that ½-inch slit in Step 2, aim for the side of the stem where you'll bury it—not the top. The slit should expose the white pith but not cut all the way through. I use a clean, sharp knife and make a single, clean cut rather than multiple nicks. This single slit creates the perfect environment for roots to form without causing unnecessary damage.
Moisture Management: During Step 3's 4-8 week waiting period, I've learned the hard way that "consistently moist" means different things in different weather. In hot, dry conditions, you might need to water every 2 days instead of 3 days. The key is that 1-inch deep soil should feel like a wrung-out sponge—never bone-dry, never soggy. Too much water causes rot, while too little means the stem gives up before roots form.
Root Testing: When checking for roots in Step 3, I've developed a two-part test: First, gently tug the layered section. If it resists but doesn't pop out, roots are forming. Second, look for new growth at the tip—this is your definitive sign. I've seen cuttings with resistance but no new growth, and they still failed. Always check both visual and tactile cues!
Pro Tips for Propagate Oak Leaf Hydrangea
- Here's what nobody tells you about layering hydrangeas—these tricks will make all the difference between success and ...
- Stem Selection Secret: In Step 1, focus on stems that are about ¼-inch thick and have 3-4 mature leaves. I always loo...
- Slit Technique: When making that ½-inch slit in Step 2, aim for the side of the stem where you'll bury it—not the top...
Frequently asked questions
Got questions about propagating your oak leaf hydrangea?
You’re not alone! Here are answers to the most common queries to help you achieve layering success with confidence.
What’s the best time of year to propagate oak leaf hydrangea?
The ideal window is late spring to early summer (May–June), when new growth is vigorous but before extreme heat sets in. This timing ensures strong root development before winter. Avoid propagating in fall or winter—your plant needs energy to establish roots!
How long does it take for oak leaf hydrangea cuttings to root?
Patience is key! With proper layering (or stem cuttings in water), roots typically form in 4–8 weeks. Keep the soil consistently moist and in partial shade. Once roots reach 1–2 inches long, your new plant is ready to transplant—usually by late summer or early fall.
Can I propagate oak leaf hydrangea from seeds instead of cuttings?
While possible, seed propagation is unreliable for oak leaf hydrangeas. Seeds may not produce true-to-parent plants, and germination rates are low. Stick with layering or stem cuttings for consistent, bushy results. Save seeds for experimental fun if you’re feeling adventurous!
Why aren’t my layers rooting? Troubleshooting tips
If your layers refuse to root, check these common culprits:
- Dry soil: Keep the rooting zone consistently damp (not soggy).
- Poor light: Too much sun scorches new growth; partial shade is best.
- Improper timing: Wait until stems are mature but flexible (not woody).
- Lack of hormones: Dip cuttings in rooting hormone for a 20–30% success boost.
How do I care for newly rooted oak leaf hydrangea?
Once rooted, transplant carefully to avoid shock. Water deeply but reduce frequency to prevent rot. Mulch around the base to retain moisture, and shield from harsh sun for the first 2–3 weeks. Fertilize lightly in spring with a balanced 10-10-10 formula to encourage blooms!
Wrapping up and next steps
Propagating oak leaf hydrangea through layering is a rewarding way to expand your garden with minimal effort! By mastering timing, moisture, and patience, you’ll soon enjoy lush, blooming bushes that thrive for years.
Whether you’re a beginner or a seasoned gardener, this method opens the door to effortless plant multiplication—so roll up your sleeves and get growing!
Ready to turn your green thumb into a hydrangea hero? Start with just one healthy plant and watch your garden transform. 🌿✨ Next step: Pick your favorite variety and begin layering—your future blooms will thank you!