
Leaf Blower
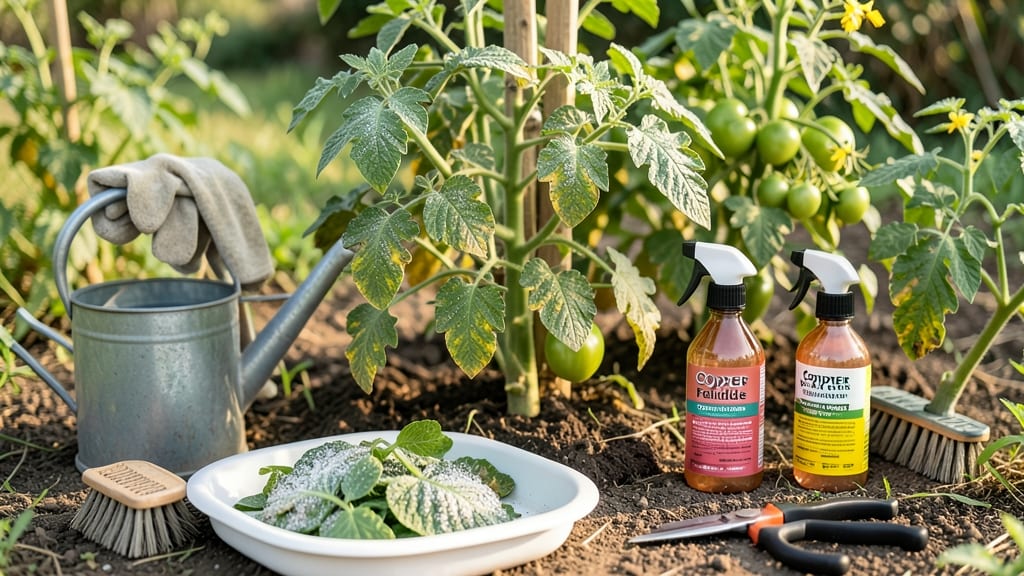
Your tomatoes are showing those telltale yellow spots and curling leaves—classic signs of a tomato leaf mold treatment that can wipe out your harvest if ignored. 🌱 I’ve battled this fungal nightmare for years, and what I’ve learned is that neem oil isn’t just a treatment—it’s a 24-hour emergency fix when applied correctly.
The key? Catching it early, acting fast, and using the right mix of organic remedies to stop the spread before it takes over your plants.
Leaf mold thrives in humid, crowded conditions, turning your lush green foliage into a sad, spotted mess in just a few days. The good news? You don’t need fancy chemicals—neem oil, copper spray, and proper airflow are all you need to turn things around.
I’ll walk you through the exact steps I use to revive my plants, including how to prune for better airflow and when to retreat for long-term protection. No more losing your entire crop to this sneaky fungus.
Within 24 hours of treatment, you’ll see the curling slow down and new growth pushing through stronger. The secret lies in consistency—spraying at dawn or dusk, keeping plants spaced properly, and removing infected leaves immediately.
This isn’t just about saving this year’s tomatoes; it’s about building a disease-resistant garden for seasons to come. Let’s get your plants back to thriving.
Whether you’re dealing with a small backyard plot or a sprawling greenhouse, these methods work everywhere. The only real difference is how quickly you act—so don’t wait until the spots spread. Grab your spray bottle, and let’s tackle this head-on before it becomes a full-blown crisis.
Hidden Triggers Behind Leaf Mold
Tomato leaf mold—caused by the fungus Fulvia fulva—isn’t just a random attack on your plants. It thrives when specific conditions align, turning your lush tomato leaves into a sad, spotted mess.
Understanding these triggers is the first step to stopping the spread. Let’s break down the real culprits behind this pesky problem.
The fungus Fulvia fulva loves dampness. When humidity hovers above 75% or leaves stay wet for prolonged periods (like after rain or overhead watering), spores germinate and infect your plants. Even morning dew can create the perfect breeding ground if airflow is poor.
- Why it matters: The fungus needs free water on leaf surfaces to penetrate tissues. Without it, spores remain dormant.
- Actionable insight: If your garden is naturally humid (e.g., coastal areas or greenhouses), reduce overhead watering and opt for drip irrigation to keep foliage dry.
Tomatoes packed too closely together or grown in tight containers create a stagnant microclimate. Without airflow, humidity lingers, and spores spread effortlessly from leaf to leaf. This is why leaf mold often starts in the lower, shaded foliage first.
- Why it matters: Still air traps moisture, slowing evaporation and extending the window for fungal infection.
- Actionable insight: Space plants 18–24 inches apart and prune suckers to improve airflow. Use fans in greenhouses to keep humidity in check.
When tomatoes are nutrient-deficient, waterlogged, or physically stressed (e.g., from pests or poor soil), their defenses weaken. Weak leaves are easier targets for Fulvia fulva, which exploits tiny wounds or even natural openings like stomata (leaf pores).
| Stress Factor | How It Helps Leaf Mold |
|---|---|
| Nitrogen deficiency | Thins cell walls, making leaves more vulnerable to fungal penetration. |
| Root rot or compacted soil | Reduces nutrient uptake, slowing recovery and leaving plants susceptible. |
| Pest damage (e.g., aphids, spider mites) | Creates entry points for spores through saliva or physical wounds. |
Actionable insight: Test soil pH (aim for 6.0–6.8) and amend with compost. Avoid over-fertilizing with nitrogen—balance it with phosphorus and potassium for stronger foliage.
Fulvia fulva thrives in warm, muggy conditions (between 60–80°F). While it can survive cooler temps, growth accelerates when nights stay warm and days are humid. This is why leaf mold flares up in summer gardens or greenhouses without ventilation.
- Why it matters: Higher temps increase the fungus’s metabolic rate, leading to faster spore production and spread.
- Actionable insight: If possible, plant tomatoes in late spring (after the last frost but before peak summer heat). Use shade cloth (30–50%) to reduce leaf temperature and evaporation stress.
Pro Tip: 💡 Monitor your garden’s microclimate with a hygrometer (humidity sensor) and adjust watering/pruning habits based on real-time data. Prevention starts with knowing your enemy’s favorite conditions!
Quick Fixes for Tomato Leaf Mold
Tomato leaf mold can turn your lush plants into a sad, spotted mess—but don’t panic! With the right approach, you can revive your tomatoes in 24 hours or less and keep future outbreaks at bay.
Below, we break down cause-specific solutions, from organic sprays to garden tweaks, plus prevention tips to protect your harvest.
---
Cause: Fungal spores (like Fulvia fulva) thrive in humid, crowded conditions, clinging to leaves and spreading via splashing water or wind.
How to Stop It: 1. 🔥 Day 1: Remove & Destroy Infected Leaves - Snip off yellowing, spotted, or curling leaves (don’t compost them—bag and trash). - Why? Prevents spores from reinfecting other leaves.
2. 🍳 Mix a Fungicide Spray (Neem Oil + Copper) - Neem oil (1 tbsp per quart of water) smothers spores and disrupts fungal growth. - Copper fungicide (2.5 tbsp per gallon) kills existing mold on contact. - Pro tip: Add 1 tsp baking soda to boost effectiveness (alkaline environment fights fungi).
3. 👨🍳 Spray Under Leaves (Critical!) - Use a hose-end sprayer for thorough coverage—undersides of leaves are mold magnets. - Reapply every 5–7 days until new growth appears (usually 10–14 days).
4. ⏰ Post-Treatment Care - Water at the base (not overhead) to keep leaves dry. - Space plants for airflow (aim for 18–24 inches between stems).
---
Cause: Poor ventilation or shady spots create the perfect mold paradise.
How to Fix It: - 💡 Prune for Airflow - Trim suckers and lower leaves to improve circulation. - Bonus: More sunlight = faster drying = fewer spores.
- ✨ Stake or Cage Tomatoes - Use tomato cages or stakes to keep plants upright (prevents leaves from touching soil).
- 🎯 Move to Sunlight - Tomatoes need 6–8 hours of sun daily. If shaded, relocate or prune nearby plants.
---
Cause: Recurring mold often means contaminated soil or tools.
How to Protect Your Plants: - 🔥 Sterilize Tools & Containers - Clean pruners, pots, and trellises with 10% bleach solution (1 part bleach to 9 parts water).
- 🌡️ Rotate Crops - Avoid planting tomatoes (or nightshades like peppers/eggplants) in the same spot for 3 years.
- 💪 Strengthen Plants Naturally - Compost tea (1 cup per gallon of water, sprayed weekly) boosts plant immunity. - Beneficial fungi like Trichoderma (available as soil drenches) outcompete mold.
- 🍅 Choose Resistant Varieties - Try ‘Mountain Merit’ or ‘Defiant PhR’—these tomatoes are mold-resistant.
--- 🚨 Emergency Alert: If mold spreads to fruit, harvest immediately (it’s safe to eat but won’t ripen well). Focus on saving next year’s plants with these fixes!
Frequently asked questions
How do I tell if my tomato leaves have leaf mold vs. early blight?
Leaf mold appears as yellow spots with grayish mold on undersides, while early blight shows brown concentric rings on topsides. The key difference? Leaf mold causes curling leaves and thrives in humid conditions, while early blight prefers dry, warm weather. Check undersides for fuzzy gray growth to confirm leaf mold.
Can I still harvest tomatoes if the leaves have leaf mold?
Yes, but focus on green tomatoes first—they're less likely to be infected. If the fruit shows signs (dark spots), harvest immediately as it won't ripen properly. The real risk is to next year's plants, so prioritize treating the leaves to save your future harvest.
How often should I apply neem oil for leaf mold prevention?
Apply every 7-10 days during humid seasons, especially after rain. For treatment, spray every 5-7 days until new growth appears (about 2 weeks). Always spray in the evening to avoid sunburning leaves and ensure full coverage on undersides.
Will copper spray harm beneficial insects like bees?
Copper fungicides are generally safe for bees when used as directed, but avoid spraying when flowers are open. For extra protection, apply in early morning or late evening when pollinators are less active. Always follow product instructions for concentration and timing.
Can I use baking soda for leaf mold treatment alone?
Baking soda helps as a supplement but shouldn't replace fungicides. Mix 1 tsp baking soda + 1 tbsp oil + 1 tsp soap per gallon of water for better adhesion. Use it alongside neem oil or copper spray for maximum effectiveness, especially in humid conditions.