
Leaf Blower
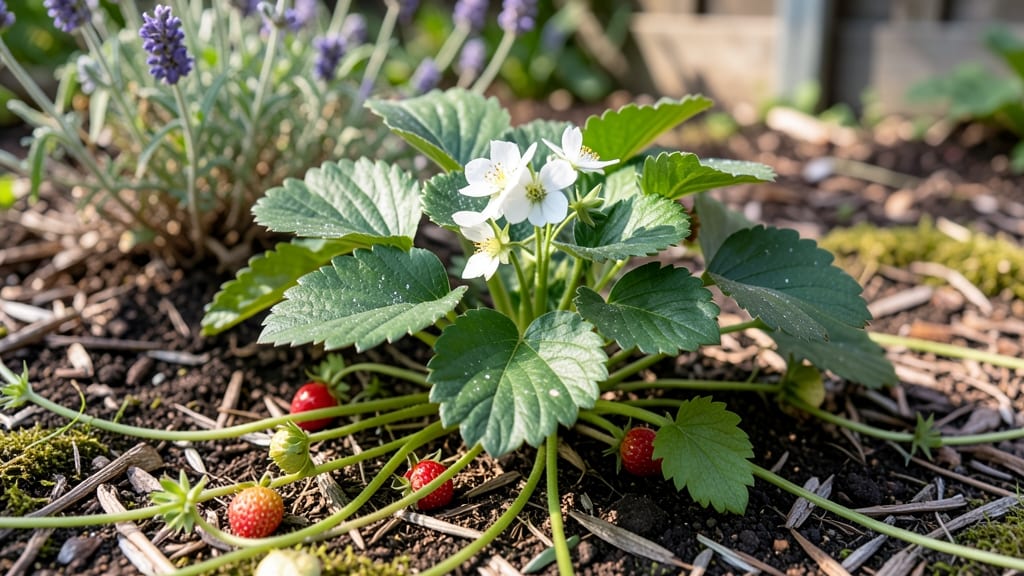
Strawberry leaf identification starts with spotting the first signs before they spread. 🌱 Healthy leaves are deep green, glossy, and free of blemishes—anything else signals trouble.
I’ve seen powdery mildew turn my strawberries into a sad, white-fuzzy mess, and knowing the difference between fungus, pests, or deficiencies saves hours of panic. The quickest way to diagnose is to check leaf edges, undersides, and stems for spots, holes, or webbing.
Yellowing between veins? Likely a nutrient issue. Tiny webs? Spider mites. Rust-colored patches? Leaf rust. Grab a magnifying glass if needed—this is where most gardeners trip up, assuming all leaf problems are the same.
📚 In This Guide
- What you need
- Instructions
- Tips and common mistakes
- Wrapping up and next steps
What you need
- ● Strawberry plants – Healthy and diseased leaves (or access to a garden/field for observation).
- ● Hand lens or magnifying glass (10x magnification recommended) for close-up inspection.
- ● Notebook and pen – To record observations, symptoms, and leaf details.
- ○ Digital camera or smartphone – For capturing leaf images (optional but helpful for documentation).
- ● Ruler or measuring tape – To note leaf size and spot measurements.
- ● Pruning shears or small knife – For safely harvesting leaf samples (sterilize with rubbing alcohol!).
- ● Plastic bags or Ziploc bags (2–3) – To store leaf samples for further analysis.
- ● Reference guide or app – Like PlantVillage or iNaturalist for disease comparisons.
- ● Gloves – To protect hands when handling diseased leaves.
- ● Spray bottle with water – For moistening leaves to check for mold or fungal growth.
- ● UV flashlight – To detect hidden symptoms under ultraviolet light.
- ● Field guidebook – On strawberry diseases (e.g., Comprehensive Guide to Strawberry Pests).
- ● Petri dishes or small containers – For culturing fungal samples (advanced users).
How to identify healthy and diseased strawberry leaves
Here's my quick method to spot trouble early—before it spreads to your whole patch.
🌿 Step 1: Examine Leaf Color and Texture for Health
Healthy strawberry leaves are a vibrant deep green with a slightly waxy surface. Run your fingers over the leaves—they should feel firm and slightly rough, like fine sandpaper. Look for uniform color without yellowing or dark spots. New growth should emerge from the center of the plant, forming fresh, bright leaves.
Watch for these red flags: yellowing between veins (chlorosis) often signals nutrient deficiencies like iron or magnesium. If leaves appear pale green or white, your plants may need more light. Dark brown or black patches usually mean fungal issues like leaf spot or botrytis. I always check the undersides of leaves first—hidden pests or early fungal growth often start there.
🌱 Step 2: Check for Common Disease Patterns
Start by looking at the leaf edges. If they show irregular brown or black spots with yellow halos, you're likely dealing with strawberry leaf spot—the most common disease. These spots often have fuzzy gray centers when conditions are humid. Remove infected leaves immediately and discard them in the trash (not compost).
For powdery mildew, check for a white, powdery coating on leaves, especially on the undersides. This fungal disease thrives in shady, humid conditions and spreads quickly. Prune infected leaves to improve airflow around the plant. If you see dark, circular spots with concentric rings, that's anthracnose, another fungal disease that requires immediate removal of affected foliage.
💧 Step 3: Inspect for Pest Damage and Physical Stress
Look closely for small holes or chewed edges—signs of slugs, snails, or caterpillars. Slug damage often leaves silver trails of mucus on leaves. If you spot tiny yellow or black insects on the undersides of leaves, those are likely aphids or spider mites. Both suck plant sap and weaken leaves, causing them to curl or turn yellow.
Physical stress shows up as brown, crispy edges (often from underwatering) or wilting leaves (usually from overwatering). Strawberry leaves should bounce back when gently pressed—if they stay limp, your plant is thirsty. Check the soil moisture by sticking your finger 1 inch deep—it should feel slightly damp, not bone-dry or soggy.
✂️ Step 4: Compare Leaves to a Healthy Reference
Take a photo of a completely healthy strawberry leaf from your patch and compare it to suspect leaves. Notice the vein pattern, leaf shape, and color consistency. Healthy leaves have smooth, serrated edges and no irregular markings. If you're unsure, check the newest leaves first—they're the most sensitive to stress and often show problems before older leaves.
I keep a small notebook by my strawberry patch to track changes. Jot down dates when you notice new spots, discoloration, or pest activity. This helps you spot patterns—like fungal issues after heavy rain or pest outbreaks after a heatwave. The sooner you identify a problem, the easier it is to treat it before it spreads.
Tips & tricks for perfect strawberry leaf inspection
These quick tips help you spot problems before they ruin your harvest—no fancy tools needed.
The Underside Check: Always flip leaves over first—this is where fungal spores and pests hide. I've caught early powdery mildew infections by noticing white fuzz on undersides long before it showed on top. Use a small flashlight if your garden is shady; light makes hidden issues stand out.
New Growth is Your Early Warning: The youngest leaves at the center of your strawberry plant show stress first. If they're curling or discolored while older leaves look fine, you've got a nutrient issue or pest problem that's spreading. I check these first every morning with my coffee—it takes two minutes and saves hours of cleanup later.
The Finger Test for Moisture: Press a leaf gently between your thumb and forefinger. Healthy leaves spring back immediately. If they stay limp, your plant is thirsty; if they feel mushy, you're overwatering. I do this test at the same time every day to catch moisture issues before they cause stress patterns.
Document Like a Detective: Keep a small notebook by your patch and jot down dates when you notice new spots or pests. I track when fungal issues appear after rain or when aphids show up after heatwaves. This helps me predict problems before they start—like knowing to check for leaf spot after three consecutive rainy days.
Pro Tips for Strawberry Leaf Identification
- These quick tips help you spot problems before they ruin your harvest—no fancy tools needed.
- The Underside Check: Always flip leaves over first—this is where fungal spores and pests hide. I've caught early powd...
- New Growth is Your Early Warning: The youngest leaves at the center of your strawberry plant show stress first. If th...
Frequently asked questions
Got questions about strawberry leaf identification?
You’re not alone! Here are some of the most common queries—plus quick answers to help you keep your plants thriving.
How do I tell if my strawberry leaves are healthy or diseased?
Healthy strawberry leaves are deep green, glossy, and free of spots or holes. Look for yellowing (chlorosis), black/brown spots, or crinkling—these are red flags for diseases like powdery mildew or leaf spot. Compare your leaves to our visual guide for clarity!
When is the best time to check my strawberry leaves for issues?
Inspect your leaves weekly during growing season (spring to fall), especially after rain or watering. Early detection is key! Focus on new growth and undersides of leaves—pests and fungi often hide there. A quick 5-minute scan can save your harvest!
What are some natural alternatives to chemical treatments for diseased leaves?
Try these DIY fixes:
- Neem oil spray: Mix 1 tsp neem oil + 1 tsp mild soap in 1 quart water. Spray on leaves (avoid fruit).
- Baking soda solution: 1 tbsp baking soda + 1 quart water + a drop of dish soap. Great for fungal issues like powdery mildew.
- Copper fungicide: Organic option for stubborn diseases like leaf blight.
Always test a small area first to avoid leaf burn!
Can I still harvest strawberries if the leaves have minor issues?
Yes! Diseased leaves ≠ spoiled fruit. Remove only the affected leaves (wear gloves!) and compost them far from your garden. Focus on harvesting clean berries—they’re safe to eat even if leaves show signs of stress. Just avoid fruits near severe damage.
What should I do if my strawberry leaves turn yellow?
Yellow leaves can mean overwatering, nutrient deficiency, or disease. Check the soil—it should be moist but not soggy. For deficiencies:
- Yellow edges → Lack of nitrogen. Use a balanced fertilizer.
- Uniform yellowing → Possible magnesium deficiency. Try Epsom salt (1 tbsp/gallon water).
- Yellow + brown spots → Fungal issue. Prune leaves and treat with copper spray.
Act fast—yellow leaves can spread!
Wrapping up and next steps
Mastering strawberry leaf identification is your first step toward a thriving garden! By recognizing healthy, yellowed, or spotted leaves, you can act quickly to protect your plants and ensure a bountiful harvest. 🌱
Ready to take action? Inspect your strawberry plants regularly and address issues early—whether it’s pruning, adjusting care, or seeking expert advice. Your green thumb is just a few leaves away from making a real difference!