
How To
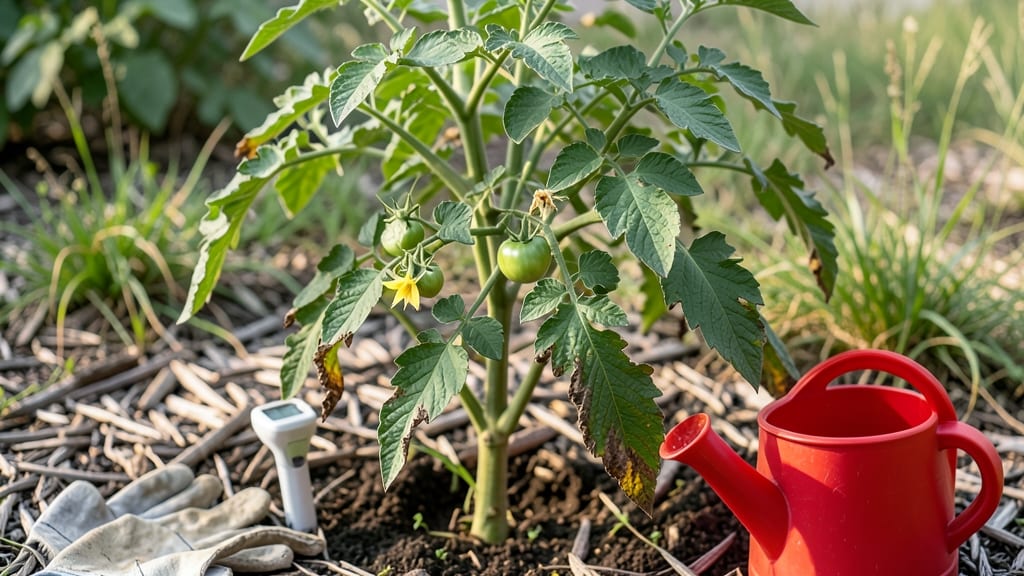
Your plants are screaming for help when leaf tips curl down and turn crispy—this isn’t just wilting, it’s a stress signal that could mean overwatering, underwatering, or even a hidden pest invasion. 🌿 I’ve seen this symptom on everything from ferns to tomatoes, and the fix isn’t always what you’d expect.
The good news? Most cases respond within minutes to the right care, saving your plants from permanent damage.
First, check the soil—if it’s bone-dry, your plant is thirsty (not dead). But if it’s soggy, you’ve got the opposite problem: root rot setting in. Spider mites love crispy tips too, so flip those leaves and look for tiny webs or specks.
The key is matching the symptom to the cause: brown, brittle edges? Probably underwatering. Yellowing underneath? Overwatering or pests.
Reviving them is easier than you think: trim the damaged tips, adjust watering (deep and infrequent works best), and mist the foliage if the air’s too dry. For pests, a strong spray of water or neem oil usually does the trick.
Within days, you’ll see new growth pushing out, and those crispy edges will soften as your plant regains its balance.
Prevention is simple: use well-draining soil, check moisture before watering, and inspect leaves weekly. Most plants bounce back fast—don’t toss them just because the tips look sad. With the right fix, you’ll have them thriving again in no time.
Root Causes Behind Crispy Leaf Tips
Understanding why your plant’s leaf tips are curling down and turning crispy starts with identifying the underlying stress factors. Each cause triggers a unique physiological response in your plant, often leading to dehydration, nutrient imbalance, or environmental shock.
Let’s break down the science behind the most common culprits so you can pinpoint the issue and take targeted action.
---
When roots sit in soggy soil for too long, they struggle to absorb oxygen, leading to root rot—a silent killer that disrupts nutrient and water uptake. As a result, the plant compensates by conserving moisture, causing leaf tips to curl downward and dry out as a survival mechanism.
Why it happens: - Waterlogged soil forces roots to suffocate, halting transpiration (water movement through the plant). - The plant prioritizes water for critical functions, leaving edges and tips to desiccate from lack of hydration. - Salt buildup from overwatering (especially with tap water) further stresses roots, blocking nutrient absorption.
Actionable clue: Check the soil 1–2 inches down—if it’s damp or smells sour, drainage is likely the issue.
---
Plants are mostly water, and when soil dries out too quickly, leaves lose moisture faster than roots can replenish it. This triggers osmotic stress, where cells shrink and edges curl inward to minimize water loss. In extreme cases, tips turn crispy as cells dehydrate and die.
Why it happens: - Inconsistent watering creates cycles of drought stress, where roots can’t keep up with the plant’s demand. - Low humidity (common in homes with central heating or air conditioning) accelerates transpiration, drying out leaf edges before the center. - Small or shallow pots dry out faster, leaving roots unable to access moisture deep enough.
Actionable clue: Press your finger into the soil—if the top layer is bone-dry, underwatering is the likely cause.
---
Plants are sensitive to sudden temperature shifts, which disrupt their stomatal regulation (the tiny pores that control water and gas exchange). Cold drafts, heaters, or AC vents can cause stomatal closure, trapping moisture inside leaves and leading to edge burn as water evaporates unevenly.
Why it happens: - Cold drafts (from windows, doors, or AC) force stomata to close to prevent frost damage, halting transpiration. - Direct sunlight + dry air (e.g., a sunny windowsill in winter) creates a desiccating effect, where leaf tips dry out faster than the rest. - Heating systems pull moisture from the air, increasing the plant’s stress—especially for tropical species.
Actionable clue: If crispy tips appear on one side of the plant (e.g., near a window or vent), environmental factors are likely at play.
---
While water issues are the top culprits, nutrient deficiencies—particularly calcium, potassium, or magnesium—can also cause leaf tips to curl and crisp. These minerals play critical roles in cell structure and hydration:
- Calcium deficiency (often from acidic or waterlogged soil) weakens cell walls, causing tips to blister and crisp. - Potassium deficiency disrupts osmotic balance, making it harder for roots to absorb water efficiently. - Magnesium deficiency (common in over-fertilized or peat-heavy soils) leads to chlorosis (yellowing) followed by crispy edges as cells break down.
Why it happens: - Over-fertilizing with nitrogen-heavy feeds can burn roots, blocking nutrient uptake. - Hard water (high in minerals) may cause salt buildup, locking out essential nutrients. - Poor soil structure (compacted or lacking organic matter) prevents roots from accessing nutrients.
Actionable clue: Yellowing between leaf veins (for magnesium) or brown, brittle tips (for calcium) often signals a mineral issue.
--- While less common, sap-sucking pests (like spider mites, aphids, or scale) and fungal/bacterial infections can weaken plants, leading to secondary dehydration symptoms. Pests pierce cells to feed, disrupting water flow and causing tips to curl and crisp as a stress response.
Why it happens: - Spider mites create tiny wounds, increasing water loss and stress hormones (like abscisic acid), which trigger curling. - Fungal infections (e.g., root rot or leaf spot) clog stomata, preventing proper gas exchange. - Bacterial leaf spot can cause necrotic (dead) tissue, which dries out and crisps at the edges.
Actionable clue: Check the undersides of leaves for webbing, sticky residue (honeydew), or discolored spots—signs of pest or disease activity.
--- When roots are disturbed (e.g., during repotting, division, or pruning), the plant diverts energy to repairing damage instead of hydrating leaves. This leads to temporary water stress, where tips curl and crisp as the plant conserves moisture until roots re-establish.
Why it happens: - Root pruning during repotting can reduce water-absorbing surface area by up to 30%. - Compacted or rocky soil restricts root growth, limiting the plant’s ability to access water. - Over-handling roots during transplanting damages mycorrhizal fungi (beneficial root partners), slowing hydration.
Actionable clue: Newly repotted plants often show crispy tips 1–2 weeks post-transplant—a sign of recovery stress.
How to Fix Crispy Leaf Tips
Reviving plants with curling, crispy leaf tips starts with identifying the root cause—and then taking action. Below are practical, step-by-step solutions tailored to the most common triggers, plus prevention tips to keep your greens thriving. Let’s turn those sad, brittle edges back into lush, happy foliage!
---
Signs: Dry, crispy edges + soil pulling away from the pot (underwatering) or yellowing leaves + soggy soil (overwatering).
#### 🔥 For Underwatered Plants 1. 🍳 Rehydrate the Roots - Place the pot in a tray filled with room-temperature water for 15–30 minutes until the top 1–2 inches of soil are damp. - Pro tip: 💡 If the plant is severely dehydrated, trim only the most damaged tips (sterilize scissors with rubbing alcohol first) to encourage new growth.
2. 👨🍳 Adjust Your Watering Routine - Check soil moisture before watering: Stick your finger 1 inch deep—if it’s dry, water; if damp, wait. - Water deeply but less often: Aim for soaked soil (not just surface moisture) every 7–10 days (adjust for humidity/climate). - Prevention: 🌡️ Use a moisture meter or self-watering pots for peace of mind.
3. 🥘 Boost Humidity (For Dry-Air Lovers) - Group plants together or use a pebble tray (fill a tray with water + pebbles, place the pot on top). - Mist leaves lightly in the morning (avoid evening to prevent fungal issues).
#### 🥘 For Overwatered Plants 1. ⏰ Let the Soil Dry Out - Remove the plant from its pot and gently loosen compacted roots with your fingers. - Repot in fresh, well-draining soil (mix in perlite or sand for aeration).
2. 🔪 Improve Drainage - Ensure pots have drainage holes—if not, drill them or switch to a terracotta pot (breathable material). - Prevention: ✨ Use cactus/succulent mix for drought-tolerant plants or orchid bark for moisture-sensitive varieties.
3. 🌡️ Monitor Temperature & Airflow - Overwatering worsens in cold, stagnant air. Keep plants in a bright, indirect spot with gentle airflow (e.g., near a fan on low).
---
Signs: Crispy, brown or white edges (like paper) + leaf scorch, often on one side of the plant.
#### 🔥 Move to Shade Immediately - Shift the plant to a spot with indirect light (e.g., east-facing window or 2–3 feet from a south-facing one). - Quick fix: 🌿 Place a sheer curtain over the plant for 3–5 days to ease stress.
#### 👨🍳 Protect from Harsh Light - Avoid midday sun (10 AM–4 PM) for tropical plants like ferns, calatheas, or peace lilies. - Prevention: 🎯 Use reflective surfaces (mirrors or white walls) to diffuse harsh sunlight.
#### 🥘 Cool Down the Plant - Wipe leaves with a damp cloth to reduce heat buildup. - For outdoor plants: 💡 Provide afternoon shade with a lightweight shade cloth (30–50% coverage).
---
Signs: Brown, crispy tips spreading from the edges inward + white crust on soil (hard water) or yellowing (over-fertilization).
#### 🔥 Flush the Soil 1. 🍳 Water thoroughly for 5–7 days straight to leach out excess salts.
2. 👨🍳 Repot if severe: - Remove the plant, rinse roots in room-temperature water, and repot in fresh, sterile soil. - Prevention: ✨ Use rainwater or filtered water (hard water = high minerals = burn risk).
#### 🥘 Adjust Fertilizer Use - Stop fertilizing for 4–6 weeks to let the plant recover. - Switch to: 💪 Organic fertilizers (like fish emulsion or worm castings) or diluted liquid feeds (½ the recommended dose). - Prevention: 📊 Test soil every 3–6 months (DIY kits are affordable!) to monitor pH and nutrient levels.
---
Signs: Sticky residue (aphids), tiny holes (spider mites), or black/moldy spots (fungus).
#### 🔥 Isolate & Treat Infestations 1. 🍳 Quarantine the plant to prevent spread. 2. 👨🍳 Wipe leaves with a soapy water solution (1 tsp mild dish soap + 1 quart water) or neem oil spray (mix 1 tsp neem oil + 1 tsp soap + 1 quart water).
3. 🥘 Repeat every 3–5 days until pests are gone.
#### 🌡️ Prevent Fungal Issues - Avoid overhead watering—water at the soil base instead. - Prevention: ✨ Space plants for airflow and sterilize pruners between cuts.
---
- Trim damaged tips with clean scissors to redirect energy to healthy growth. - Fog leaves lightly in the morning to boost humidity without drowning roots. - Rotate the pot weekly so all sides get even light exposure.
--- Remember: Most plants bounce back in 2–4 weeks with consistent care. Keep an eye on progress—and celebrate those plump, green leaves when they return! 🌿✨
Frequently asked questions
Why do my plant's leaf tips curl down and turn crispy even when the soil feels moist?
This often signals root rot or nutrient imbalance. When roots suffocate in soggy soil, they can't absorb water efficiently, causing the plant to conserve moisture by curling leaf edges. Check for a sour smell or mushy roots—if present, repot in fresh, well-draining soil immediately.
Can I save a plant if most of its leaves have crispy tips?
Yes! Trim the damaged tips with clean scissors and focus on fixing the root cause (water, light, or pests). Most plants recover within 2–4 weeks with proper care. For severe cases, propagate healthy cuttings to grow new plants while you revive the original.
How do I tell if crispy tips are from underwatering vs. overwatering?
Underwatering causes dry, brown tips with soil pulling away from the pot, while overwatering shows yellowing leaves and soggy soil. Press your finger 1 inch deep—if dry, water more deeply; if damp, let it dry out and improve drainage.
Will misting leaves help crispy tips caused by dry air?
Misting provides temporary relief but isn't a long-term fix. For dry-air issues, boost humidity with a pebble tray or group plants together. Focus on adjusting watering and ensuring proper airflow—this prevents further stress.
Can hard water cause crispy leaf tips?
Hard water leaves mineral deposits that block nutrient absorption, leading to crispy edges. Flush the soil with filtered or rainwater for 5–7 days to remove buildup. Repot if needed with fresh, sterile soil.