
Pests and Diseases
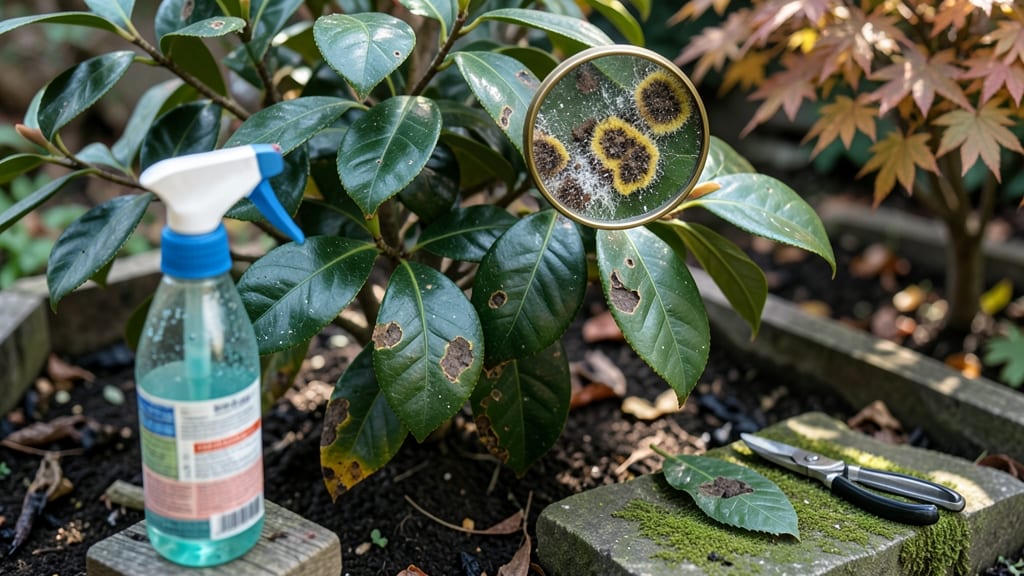
Your camellias’ glossy leaves shouldn’t look like a crime scene. 🌿 Camellia leaf spot turns vibrant foliage into a patchwork of brown splotches with yellow halos—usually within weeks of heavy rain or crowded branches.
The good news? This fungal mess responds fast to the right moves, and I’ve saved my own plants with simple, organic fixes that actually work.
Most cases start with Cercospora or Pseudocercospora fungi thriving in damp, low-light conditions. You’ll spot it first on older leaves, then spreading like a bad rumor.
The key to stopping it? Prune for airflow (cut back crowded branches by 25%), water at the roots (never overhead), and clean up fallen leaves—they’re fungus hotels. I’ve seen full recovery in as little as 3-4 weeks with consistent care.
Start with a copper fungicide spray (like Bonide Copper Fungicide) applied every 7-10 days until new growth appears. For stubborn cases, add sulfur dust to the soil—it’s like a shield against future outbreaks.
The goal isn’t just to stop the spots but to restore that deep, velvety green your camellias were born to have.
Pro tip: Differentiate leaf spot from anthracnose (which causes sunken, crinkled spots) by checking for raised edges on the brown patches—leaf spot’s signature. Once you catch it early, your plants rebound faster than you’d think. Let’s get those leaves spotless again!
Root Causes of Leaf Blemishes
Camellias are prized for their glossy, evergreen leaves—and when those leaves develop unsightly spots, it’s often a sign of underlying stress or infection. Understanding why these spots appear is the first step to restoring your plant’s health.
Below, we break down the most common culprits, from fungal invaders to environmental triggers, with actionable insights to help you tackle the problem at its source.
Fungal pathogens are the #1 cause of leaf spot diseases in camellias, thriving in warm, humid conditions. Here’s how they strike: - Exobasidium camelliae (Camellia Blight) - This fungal disease causes large, yellowish-brown spots that eventually turn black and crusty. It spreads via airborne spores, especially in high humidity (above 70%) and poor air circulation. - Why it happens: The fungus enters through wounded leaves or stems (e.g., from pruning, hail, or insect damage) and exploits weak plant defenses. Overhead watering directly wets foliage, creating the perfect breeding ground. - Red flag: Spots often appear on young, tender growth first, then spread downward. - Alternaria and Cercospora Species - These fungi create small, dark, concentric spots with feathery edges. They thrive in hot, humid summers and can survive on fallen leaves or mulch. - Why it happens: Spores splash onto leaves during rain or irrigation, especially if the plant is nutrient-deficient (low nitrogen or potassium). Weakened camellias are more susceptible. - Red flag: Spots may appear purple or brown with a yellow halo, often on older leaves. Even without fungi, your camellia’s leaves can develop spots due to environmental factors. Here’s how: - Overwatering or Poor Drainage - Why it happens: Soggy soil stresses roots, reducing the plant’s ability to absorb nutrients. This weakness makes leaves prone to physiological spots (e.g., brown, water-soaked patches) or fungal infections. - Key factors: -- 💡 Compacted or clay-heavy soil holds excess moisture, suffocating roots.
- 💡 Lack of mulch leads to soil crusting, preventing water evaporation.
- 💡 Pot-bound plants (roots circling the container) can’t absorb water efficiently.
- 🔥 Sun scorch: White or brown patches on leaves exposed to direct afternoon sun after a cold night.
- 🌡️ Cold injury: Black or purple spots on leaves after temperatures drop below 20°F.
- 💡 Thick mulch piled against the stem blocks airflow.
- 💡 Plants too close together in containers or beds.
- 💡 No pruning leads to shady, humid pockets in the canopy.
- 🕷️ Spider mites: Tiny yellow stipples (feeding scars) that turn brown.
- 🐛 Scale insects: Sticky residue (honeydew) attracts sooty mold, darkening spots.
- 💨 Strong winds tear leaves, creating irregular brown edges.
- ✂️ Dirty pruning tools spread pathogens between cuts.
- 🌧️ Hail or heavy rain bruises leaves, leading to water-soaked spots.
Next up: We’ll dive into organic treatments to banish spots and restore your camellia’s lush, spot-free foliage—without harsh chemicals.
Practical fixes for fungal leaf troubles
Fungal leaf spots on your camellias don’t have to be a permanent eyesore—with the right approach, you can restore your plant’s health and prevent future outbreaks.
Below are targeted solutions based on the most common causes, from quick fixes to long-term prevention. Let’s get your camellias back to their lush, spot-free glory!
---
If your camellias are sitting in soggy soil, fungal spores thrive in the damp, humid conditions they create. Here’s how to dry things out and improve airflow:
- 🔥 Adjust Your Watering Routine - Water only when the top 1–2 inches of soil are dry (stick your finger in to check!). - Morning watering is key—it gives leaves time to dry before evening humidity sets in. - Avoid overhead sprinklers; use drip irrigation or soaker hoses to keep foliage dry.
- 👨🍳 Improve Soil Drainage - Amend heavy or compacted soil with perlite, sand, or compost to boost aeration. - If planting in containers, ensure pots have drainage holes and use a well-draining potting mix (like a 50/50 blend of peat moss and perlite). - Raise garden beds slightly if your yard has poor drainage.
- ⏰ Prune for Better Airflow - Thin out crowded branches to reduce humidity trapped among leaves. - Remove heavily infected leaves (sterilize pruners with rubbing alcohol between cuts).
💡 Pro Tip: Mulch with wood chips or pine straw (2–3 inches deep) to help soil retain moisture without staying soggy. Keep mulch 6 inches away from the trunk to prevent rot.
---
Once leaf spots appear, act fast with natural fungicides to stop the spread. These remedies are safe, effective, and won’t harm beneficial insects.
- 🍳 Baking Soda Spray (Preventative & Mild Cases) - Mix 1 tsp baking soda + 1 tbsp horticultural oil + 1 tsp mild soap per gallon of water. - Spray undersides of leaves (where spores hide) and stems every 7–10 days until new growth appears. - Best for: Early-stage infections or as a preventive spray during rainy seasons.
- 🥘 Neem Oil (Fungicidal & Preventative) - Combine 1 tbsp neem oil + 1 tsp mild soap in 1 quart of water. - Spray evenly on all surfaces (including soil around the base) every 2 weeks during humid months. - Why it works: Disrupts fungal spores and deters future infections. - ⚠️ Warning: Apply in early morning or late evening to avoid burning leaves in sunlight.
- 🔪 Copper Fungicide (For Severe Outbreaks) - Use liquid copper fungicide (like Bonide Copper Fungicide) as a last-resort treatment. - Follow label instructions—typically spray every 10–14 days until symptoms disappear. - Best for: Advanced infections when organic sprays alone aren’t enough.
--- The best defense is a proactive routine. Keep your camellias healthy with these habits:
| Prevention Step | How to Do It | When to Do It | |---------------------------|---------------------------------------------------------------------------------|----------------------------------| | Sanitize Tools | Wipe pruners with rubbing alcohol after each use. | Before and after pruning. | | Clean Up Debris | Remove fallen leaves and mulch around the base to eliminate spore hiding spots. | Weekly during rainy seasons. | | Fertilize Right | Use a balanced, slow-release fertilizer (like 10-10-10) to avoid overfeeding, which stresses plants. | Early spring and mid-fall. | | Choose Resistant Varieties | Opt for camellia cultivars like ‘Yuletide’ or ‘Spring’s Promise,’ which are less prone to leaf spot. | When replanting or buying new plants. | | Monitor Humidity | Install a small fan near potted camellias or prune for airflow in garden beds. | Year-round, especially in humid climates. |
--- Healthy camellias resist infections better.
Give yours a fighting chance with: - 💪 Foliar feeding with seaweed extract (rich in growth hormones and antioxidants). - 🍎 Companion planting with rosemary or thyme—their antifungal properties deter fungal growth. - 🌿 Regular inspections (check undersides of leaves weekly for early signs of spots).
--- By tackling the root cause (literally!) and combining preventative care with targeted treatments, your camellias will bounce back faster—and stay spot-free for seasons to come. No more brown blotches ruining your blooms! 🌿💚
Frequently asked questions
How can I tell if my camellia has leaf spot versus another disease?
Leaf spot typically shows as small, dark brown/black spots with yellow halos on older leaves, often with raised edges. For confirmation, check for concentric rings (like a bullseye) or feathery edges—these are classic signs. Compare to anthracnose (sunken, crinkled spots) or rust (orange pustules). If spots appear suddenly after rain, it’s likely fungal.
Will pruning help stop the spread of leaf spot?
Prune 25-30% of crowded branches to improve airflow—this dries leaves faster and removes infected foliage. Always sterilize tools with rubbing alcohol between cuts, and dispose of infected leaves in the trash (not compost). Focus on thinning inner branches first, where humidity traps spores.
How often should I apply fungicide treatments?
For organic sprays like neem oil or baking soda, apply every 7-10 days until new growth appears. Copper fungicides require every 10-14 days during active outbreaks. Always spray early morning or late evening to avoid leaf burn, and cover both leaf surfaces (especially undersides where spores hide).
Can I save severely infected camellias?
Yes! Remove all infected leaves (even if it looks drastic) and apply copper fungicide immediately. For stubborn cases, prune back to healthy wood and repot in fresh, sterile soil. With consistent care, many camellias recover fully within 3-4 weeks. The key is acting fast before spores spread to new growth.
What’s the best way to prevent leaf spot next season?
Start with proper spacing (3-4 feet between plants) and drip irrigation to keep foliage dry. Add 2-3 inches of wood chip mulch (keep it 6 inches from the trunk) and plant rosemary or thyme nearby—their antifungal properties help deter spores. Apply a preventative neem oil spray every 2 weeks during rainy seasons.