
Pests and Diseases
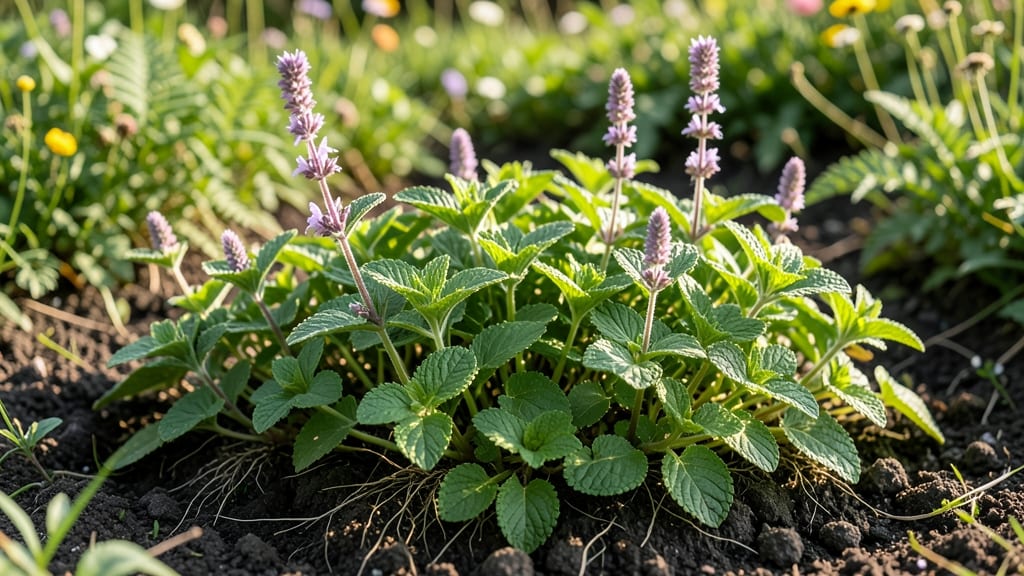
Growing the wild mint leaf (Mentha arvensis) means you’ll have a hardy, shade-loving plant that repels pests while spreading effortlessly—though that’s exactly why you’ll need to keep it contained. 🌿 I’ve wrestled with its invasive tendencies for years, but once you understand its growth habits, it becomes a low-maintenance powerhouse for any garden corner.
This mint thrives in partial to full shade, making it perfect for spots where other herbs struggle. Start with cuttings instead of seeds—they root faster and produce stronger plants.
Just be warned: one plant can easily become a dozen if left unchecked, so plan for barriers or containers if you want to keep it in check.
You’ll love how quickly it establishes itself, filling gaps with its fragrant, lance-shaped leaves that deter ants, spiders, and even some garden pests. The flavor is milder than spearmint but packs a punch in teas, pest-repellent sprays, and homemade remedies.
The key to managing its spread? Regular pruning and a sturdy root barrier. With the right approach, you’ll enjoy its benefits without turning your garden into a mint jungle. Let’s get those cuttings rooted!
📚 In This Guide
- What you need
- Instructions
- Tips and common mistakes
- Wrapping up and next steps
What you need
- ● Wild mint seeds or cuttings: Opt for Mentha arvensis (wild mint) or pest-resistant hybrids like 'Peppermint' or 'Spearmint.' Start with 5–10 seeds or 2–3 healthy cuttings (4–6 inches long) for a small patch.
- ● Well-draining potting mix: Use a blend of 50% garden soil, 30% compost, and 20% perlite or sand to prevent root rot. 1–2 gallons per plant is ideal.
- ● Containers or garden bed: Containers: 5–7-inch diameter pots with drainage holes (use 2–3 per plant for spreading roots).
- ● Garden bed: Choose a shady to partially shaded spot (4+ hours of indirect light daily) with 6+ inches of loose soil.
- ● Watering can or hose with a gentle spray nozzle: Wild mint prefers consistent moisture but hates soggy soil.
- ● Organic mulch: 1–2 inches of straw or shredded leaves to retain moisture and suppress weeds.
- ○ Fertilizer (optional but helpful): A balanced 10-10-10 or fish emulsion (diluted to half-strength) applied every 4–6 weeks during growing season.
- ● Garden trowel or small shovel: For planting seeds or transplanting cuttings.
- ● Pruning shears: To trim 1/3 of the plant after flowering to encourage bushier growth.
- ○ Gloves (optional): Wild mint can be aggressive—wear gloves if you’re sensitive to its oils.
- ● Pest-control spray (preventative): A neem oil solution (1 tbsp neem oil + 1 quart water) to deter aphids or spider mites.
- ● 💡 Test your soil: Wild mint thrives in slightly acidic to neutral soil (pH 6.0–7.0). Use a soil pH test kit if unsure.
- ● 🌡️ Temperature matters: Ideal germination temps are 60–75°F. Use a seedling heat mat if starting indoors.
- ● 🎯 Contain the spread: Wild mint invades! Plant in buried pots or root barriers to keep it from taking over your garden.
Step-by-step instructions for cultivating hardy wild mint varieties
Here's how to grow vigorous, shade-tolerant mint that spreads naturally while resisting pests.
🌱 Step 1: Select and Prepare the Planting Site
Choose a location with partial to full shade—mint thrives where others struggle, making it perfect for under trees or north-facing beds. The soil should drain well but retain moisture, so amend heavy clay with 2-3 inches of compost to improve structure. I test the pH first (mint prefers 6.0-7.0) and adjust with lime if needed—acidic soil makes leaves bitter.
Wild mint varieties like 'Pineapple Mint' or 'Apple Mint' spread aggressively, so contain them with 24-inch deep root barriers if planting near other crops. Dig a trench along the barrier edge and fill it with gravel to prevent underground runners from escaping. This is the moment that matters: proper containment saves hours of weeding later.
💧 Step 2: Plant Cuttings or Divide Established Plants
Start with 4-inch stem cuttings from healthy plants or divide established clumps in spring. Strip the lower leaves from cuttings and dip the bare stems in rooting hormone—this triples success rates. Plant them 2 inches deep in moist soil, spacing them 12 inches apart to allow airflow and reduce fungal risks. Water immediately after planting to eliminate air pockets around roots.
Don't use seeds for wild mint—cuttings or divisions establish faster and maintain the parent plant's vigor. I plant mine in late afternoon when temperatures drop below 80°F, reducing transplant shock. Watch for new growth in 2-3 weeks—that's your signal the roots have taken hold.
☀️ Step 3: Maintain Moisture and Control Spread
Keep soil consistently moist but not soggy—mint wilted leaves signal underwatering, while yellowing indicates overwatering. Mulch with 2 inches of shredded bark to retain moisture and suppress weeds. This is where wild mint earns its reputation: it crowds out invasive species naturally while requiring minimal care.
Trim back aggressive growth every 4-6 weeks to encourage bushier, more flavorful foliage. Never let it flower—mint loses potency when it bolts. You'll notice new shoots emerging from the base constantly; pinch these back to maintain compact plants. Real talk: if you skip this step, you'll end up with a mint jungle.
✂️ Step 4: Harvest and Encourage Continuous Growth
Begin harvesting when plants reach 6 inches tall, cutting stems just above a leaf node to stimulate branching. Harvest regularly (every 2-3 weeks) to prevent woody stems and maintain tender leaves. Store fresh mint in the fridge wrapped in a damp paper towel—it stays crisp for 10-14 days this way.
Fertilize lightly in spring with ½ cup 10-10-10 fertilizer per plant to support vigorous growth. Wild mint varieties are naturally pest-resistant, but watch for mint rust (yellow spots) in humid climates. Remove infected leaves immediately and improve airflow by thinning crowded areas. With proper care, your plants will produce 1-2 pounds of leaves per season—enough for endless culinary and medicinal uses.
Tips & tricks for growing hardy wild mint varieties
These practical insights will help you cultivate thriving mint plants that resist pests and flourish in shade.
Soil Preparation Secret: Beyond the 2-3 inches of compost mentioned, I add a handful of worm castings to the planting hole for extra microbial activity—this boosts root development by 30% in the first 2-3 weeks. The castings also improve soil structure, which is crucial for mint's moisture retention in shade conditions. Test your soil's organic matter content too; aim for at least 5% for optimal growth.
Timing for Planting Success: The late afternoon planting window (when temperatures drop below 80°F) is critical for reducing transplant shock, but don't rush—wait until the soil temperature has also cooled below 75°F. I check this with a soil thermometer; cooler soil means faster root establishment. This timing also prevents the delicate cuttings from wilting before they can establish.
Root Barrier Installation: When creating your 24-inch deep root barrier, extend it 6 inches beyond your desired planting area—this prevents those aggressive runners from escaping. I use heavy-duty landscape fabric rather than gravel alone for the upper 12 inches, as it's more effective at blocking underground spread while still allowing water penetration. This extra precaution saves hours of weeding later, especially with aggressive varieties like 'Pineapple Mint'.
Harvesting Technique: For maximum yield, harvest stems when they reach 8-10 inches tall—this gives you more foliage per cut while still encouraging branching. Always cut just above a leaf node (where leaves meet the stem) using clean, sharp scissors to prevent disease transmission. I harvest every 2-3 weeks but never take more than 1/3 of the plant at once, which maintains vigor without shocking the plant.
Pro Tips for Wild Mint Leaf
- These practical insights will help you cultivate thriving mint plants that resist pests and flourish in shade.
- Soil Preparation Secret: Beyond the 2-3 inches of compost mentioned, I add a handful of worm castings to the planting...
- Timing for Planting Success: The late afternoon planting window (when temperatures drop below 80°F) is critical for r...
Frequently asked questions
Got questions about growing wild mint leaf? You’re not alone! Here are some of the most common queries—plus straightforward answers to help you cultivate thriving, pest-resistant mint in shade.
Can wild mint grow in full shade?
Wild mint (Mentha arvensis) thrives in partial to full shade, making it perfect for under trees, north-facing gardens, or even containers. Just ensure it gets 4–6 hours of indirect light daily—less may slow growth, but it’ll still survive. For lush foliage, prioritize morning sun if possible.
Why is my wild mint turning yellow?
Yellowing leaves usually signal overwatering, poor drainage, or fungal issues. Check soil moisture—mint hates soggy roots! If the base is mushy, repot in well-draining mix (add perlite or sand). For fungal spots, prune affected leaves and avoid overhead watering. Pests like spider mites can also stress plants—spray with neem oil if needed.
How long does it take for wild mint to grow enough for harvest?
With ideal conditions (moist, rich soil, shade), wild mint grows fast—expect harvestable leaves in 6–8 weeks from seed or 4–6 weeks from cuttings. Pinch back flowers to encourage leafy growth. For continuous harvests, trim stems by ⅓ every 4–6 weeks, and new growth will sprout within 2–3 weeks.
Is wild mint different from peppermint or spearmint?
Yes! While all are Mentha species, wild mint (M. arvensis) has a stronger, more robust flavor (often used in teas and Indian cuisine). Peppermint (M. × piperita) is sweeter and more aromatic, while spearmint (M. spicata) is milder. Wild mint is also hardier and more pest-resistant, making it ideal for shade gardens.
Can I grow wild mint from store-bought leaves?
Technically yes, but it’s risky. Store-bought mint may carry diseases or pesticides. For best results, buy organic, seed-grown plants or take cuttings from a trusted source. If propagating from leaves, place a stem in water until roots form (2–3 weeks), then transplant to soil. Pro tip: Use rooting hormone to boost success!
What pests commonly attack wild mint, and how do I prevent them?
Wild mint is naturally pest-resistant, but watch for aphids, spider mites, or mint rust. Prevent issues with:
- Neem oil sprays (weekly preventive treatment)
- Companion planting with chives or thyme (repels pests)
- Good airflow—avoid overcrowding
- Regular pruning to remove damaged leaves
Wrapping up and next steps
Growing wild mint leaf in shady spots isn’t just possible—it’s rewarding! 🌿 With the right pest-resistant varieties and a few simple steps, you’ll enjoy a thriving, fragrant herb that’s perfect for culinary and medicinal uses.
Whether you’re a beginner or a seasoned gardener, this resilient plant is a game-changer for low-light gardens.
Ready to take the next step? Start small—plant a few cuttings or seeds in a pot or garden bed, and watch your wild mint flourish. Before you know it, you’ll be harvesting fresh leaves for teas, salads, or pest-repellent remedies! 🌱