
Pruning
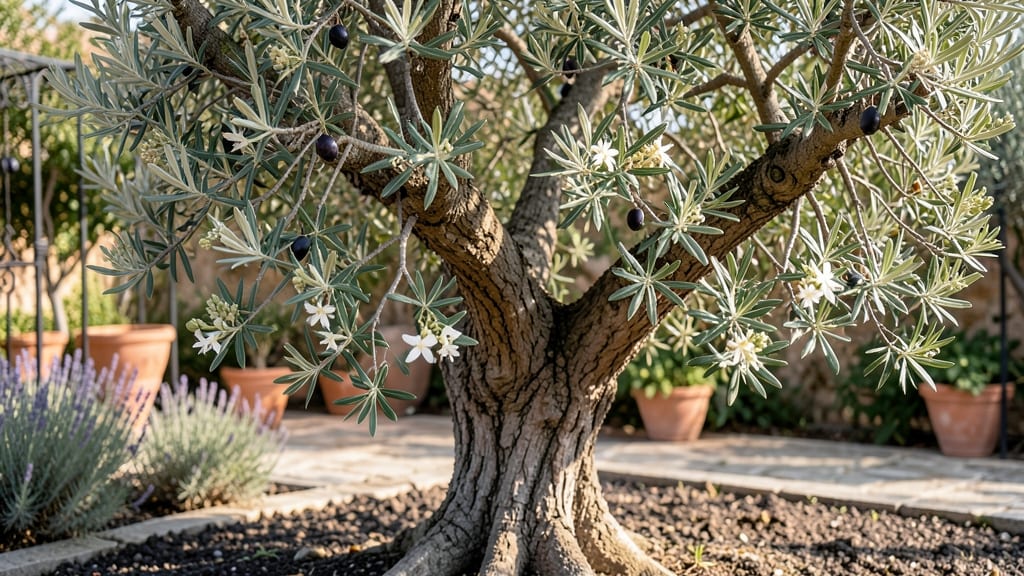
Pruning your olive leaf tree (Olea europaea) isn’t just about shaping—it’s about unlocking year-round growth and a canopy so dense you’ll forget it’s just one plant. 🌿 I’ve turned my once-sparse olive into a lush, productive specimen by pruning at the right times, and the difference is shocking.
That first flush of spring growth? It’s all about timing and technique.
The secret starts with your tools: clean, sharp pruners and a clear plan. Olive trees respond best to light, strategic cuts—never hacking. Focus on removing dead wood first, then thin out crowded branches to let sunlight reach the center.
In warmer climates, you can prune year-round, but in colder areas, wait until late winter or early spring before new growth begins.
What you’ll end up with is a tree that stays green even in summer droughts, produces those fragrant olive leaves for tea, and develops fruit if you’re growing edible varieties.
The canopy fills in beautifully, and you’ll notice fewer pests too—olives thrive when they’re not overcrowded. Just avoid heavy pruning in fall, or you risk stunted growth next spring.
This method works for both ornamental and edible olives, whether planted in the ground or containers. The key is patience—olives grow slowly, but with the right cuts, they’ll reward you with decades of lush, productive foliage. Ready to transform your tree? Let’s get started with the basics.
📚 In This Guide
- What you need
- Instructions
- Tips and common mistakes
- Wrapping up and next steps
What you need
- ● Pruning shears: Bypass pruners (sharp, 6-8 inch blades) – 1 pair (for small branches).
- ● Loppers: Heavy-duty, 18-24 inch – 1 pair (for thicker branches up to 2 inches in diameter).
- ● Pruning saw: Curved-tooth saw (for branches thicker than 2 inches) – 1.
- ● Gloves: Heavy-duty, cut-resistant – 1 pair (to protect your hands from thorns and rough bark).
- ● Disinfectant: 70% isopropyl alcohol or rubbing alcohol – small bottle (to sterilize tools between cuts).
- ● Rags or paper towels: – 2-3 (for cleaning tools and wiping sap).
- ○ Pruning sealant: Optional but recommended – small tube (to prevent disease in larger cuts).
- ● Ladder or step stool: Sturdy, extendable – 1 (if your tree is taller than 6 feet).
- ● Trash bags or bucket: – 1-2 (for collecting pruned branches).
- ● Hand pruners: Small, ergonomic – 1 pair (for delicate trimming).
- ● Safety glasses: – 1 pair (to protect from debris).
- ● Notebook & pen: – 1 (to sketch a pruning plan or track progress).
- ● Fertilizer (balanced, slow-release): – small bag (to nourish the tree post-pruning).
- ● Mulch: Organic (wood chips or straw) – 1-2 bags (to retain moisture and protect roots).
- ● ✅ Best time to prune: Late winter or early spring (before new growth starts). Avoid pruning in extreme heat or cold.
- ● 💡 Know your tree: Identify dead, diseased, or crossing branches before you start cutting. Look for signs like discoloration, fungal growth, or branches rubbing together.
- ● ⏰ Timing matters: Prune on a dry, overcast day to reduce stress on the tree and minimize sap flow.
- ● 🌡️ Temperature check: Avoid pruning if temperatures are expected to drop below 40°F or rise above 90°F in the next 24 hours.
Instructions for pruning your olive leaf tree
Here's the straightforward method I use to keep my olive leaf tree thriving with a full, healthy canopy.
✂️ Step 1: Choose the Right Time to Prune
Prune your olive leaf tree in late winter or early spring, just before new growth begins. This timing lets you shape the tree without disrupting its natural cycle. Avoid pruning in fall or winter, as cold weather slows healing and invites disease. I always check my local frost dates—if frost is still possible, wait.
You’ll notice fresh, plump buds forming along the branches. That’s your signal to start. If you prune too early, you’ll cut back growth that hasn’t even begun. If you wait too long, the tree will focus energy on leaves instead of structural shaping.
✂️ Step 2: Remove Dead or Diseased Branches First
Start by inspecting the tree for any branches that are brown, brittle, or showing signs of disease—like black spots or oozing sap. Use clean, sharp pruning shears to cut these branches back to the main trunk or a healthy lateral branch. Olive trees are tough, but dead wood won’t recover, and leaving it on stresses the whole plant.
Make your cuts at a 45-degree angle, about ¼ inch above a leaf node or outward-facing bud. This encourages new growth in the right direction. If a branch is larger than ½ inch thick, use loppers and seal the cut with pruning sealant to prevent disease entry.
✂️ Step 3: Thin Out Crowded or Crossing Branches
Next, focus on thinning the canopy to improve airflow and sunlight penetration. Look for branches that rub against each other or grow inward toward the center of the tree. These compete for resources and can create weak spots. Remove about 20-30% of the total branches, cutting back to a strong lateral branch or the main trunk.
Don’t overdo it—olive trees respond well to moderate pruning. You’ll see a more open structure with fewer crowded branches. If you’re unsure which to cut, imagine sunlight streaming through the tree. The goal is to let light reach the inner leaves without leaving large gaps.
☀️ Step 4: Shape the Tree for Balance and Fullness
Now it’s time to shape the tree to encourage a full, lush canopy. Start by identifying the main branches—these should form a strong framework. Prune back any that grow too close together or at awkward angles. For a more rounded shape, trim branches on the outer edges slightly more than those in the center.
Use your shears to trim back the tips of branches by about ⅓ of their length. This stimulates bushier growth. Watch for where the tree naturally wants to fill in—those are the branches to encourage. Avoid cutting into old wood; olive trees heal slowly, and excessive pruning can leave unsightly scars.
💧 Step 5: Clean Up and Monitor for Recovery
After pruning, gather all the clippings and dispose of them properly—either in a sealed bag or by burning (if allowed in your area). Olive tree prunings can harbor pests or diseases, so don’t leave them lying around the base of the tree. Give the tree a light watering to help it recover from the stress of pruning.
Over the next few weeks, keep an eye on the tree. You’ll see new growth emerging from the pruned areas within 4-6 weeks. If you notice any yellowing leaves or wilting, it could be a sign of over-pruning or stress. Olive trees are resilient, but they need time to adjust—don’t prune again until next season.
Tips & tricks for pruning your olive leaf tree
Here's what nobody tells you about keeping your olive leaf tree looking its best after pruning.
Timing is Everything: The late winter to early spring window is critical because olive trees store energy in their branches over winter. Pruning too early removes potential growth buds, while waiting too long means you're cutting back new leaves instead of shaping the tree's structure. I learned this the hard way after pruning my tree in early spring and watching it struggle to recover.
The 45-Degree Cut Secret: That angle isn't just for looks—it helps water run off the cut and prevents moisture from pooling where diseases can take hold. When making cuts larger than ½ inch, seal them immediately with pruning sealant. I've seen olive trees develop fungal infections from unsealed cuts, so don't skip this step even if your tree looks healthy.
Visual Pruning Technique: Before making any cuts, stand back and look at your tree from all angles. Imagine sunlight streaming through it—this helps identify branches that block light. Remove about 20-30% of the total branches to maintain that open structure. I use a small mirror on a pole to check hard-to-see spots, especially on larger trees.
Recovery Monitoring: Those 4-6 weeks after pruning are crucial. Yellowing leaves or wilting branches signal over-pruning or stress. Olive trees are tough, but they need time to adjust. I keep a pruning journal noting which branches I cut and when new growth appears—this helps me track recovery patterns year to year.
Pro Tips for Olive Leaf Tree
- Here's what nobody tells you about keeping your olive leaf tree looking its best after pruning.
- Timing is Everything: The late winter to early spring window is critical because olive trees store energy in their br...
- The 45-Degree Cut Secret: That angle isn't just for looks—it helps water run off the cut and prevents moisture from p...
Frequently asked questions
Got questions about pruning your olive leaf tree for that perfect year-round look? You’re not alone! Here are some of the most common queries—and their answers—to keep your tree thriving.
When is the best time to prune an olive leaf tree?
The ideal time to prune is late winter or early spring, just before new growth begins. This helps stimulate fresh foliage while avoiding harsh summer heat or winter dormancy. For mild climates, light pruning can also be done in early fall to shape the tree before winter.
How much can I prune without harming the tree?
Olive leaf trees are hardy but don’t overdo it! Aim to remove no more than 25-30% of the canopy in a single session. Heavy pruning can stress the tree, so space it out over a few years if needed. Focus on dead, diseased, or crossing branches first.
Can I prune olive leaf trees in winter?
While winter isn’t the best time, a light trim in mild winters is fine to remove deadwood or shape the tree. Avoid heavy pruning in freezing temps—wait until temperatures rise above 40°F (4°C) to prevent shock. If your area gets harsh winters, prune in early spring instead.
What if my olive leaf tree isn’t growing after pruning?
Slow growth could mean over-pruning, poor soil, or nutrient deficiencies. Check for yellowing leaves (a sign of nitrogen deficiency) and fertilize lightly with a balanced 10-10-10 mix in spring. If the tree looks stressed, reduce future pruning and ensure it gets 6+ hours of sunlight daily.
Are there alternatives to traditional pruning for shaping?
Yes! Try topiary for a formal look or espalier training to grow the tree flat against a wall. For a natural shape, use selective pruning to encourage airflow and sunlight penetration. Just avoid "lion’s tail" pruning (cutting all branches back to stubs)—this can stunt growth.
Wrapping up and next steps
Pruning your olive leaf tree isn’t just about aesthetics—it’s the secret to unlocking year-round vitality and a lush, thriving canopy. 🌿 By mastering the right techniques, timing, and tools, you’ll encourage healthy growth, boost fruit production, and even prevent pests.
Whether you’re a seasoned gardener or just starting, every trim brings you closer to a stunning, productive tree.
Ready to transform your olive leaf tree into a showstopper? Start small—pick one pruning session this season, follow the steps you’ve learned, and watch your tree flourish. Grab your tools and get pruning! 🌱