
Pests and Diseases
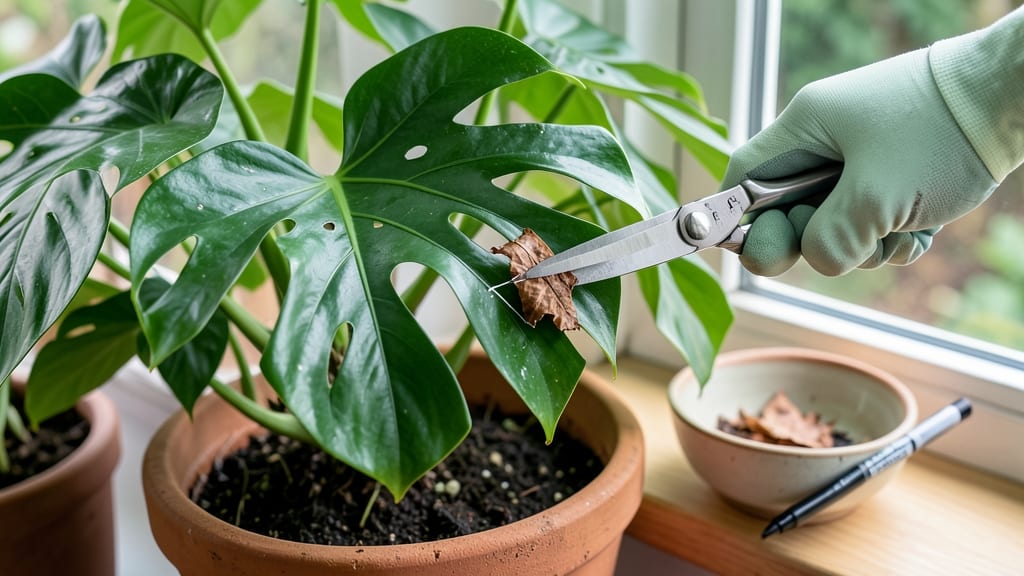
How to cut out a leaf properly might seem simple, but doing it wrong can stress your plant and invite infections. ✂️ The right technique keeps your plant healthy while preventing damage—whether you're dealing with yellowing leaves, pest damage, or fungal spots. I've learned the hard way that a clean cut and proper timing make all the difference.
A sharp pair of clean pruners is your best tool—sterilize them with rubbing alcohol before and after each use. You’ll also want to work on a dry day when the leaf is fully extended, not limp or brittle.
This ensures a clean cut that won’t tear surrounding tissue, which could leave your plant vulnerable to further stress or disease.
Start by identifying the leaf’s attachment point at the stem. Make a single, clean cut just above a leaf node or bud, angling slightly downward to encourage water runoff.
Avoid tearing—this can damage the plant’s vascular system. For larger leaves, trim them at the base to reduce stress on the plant’s energy reserves.
After removal, inspect the surrounding foliage for signs of pests or disease. If you spot anything, isolate the plant or treat it promptly. Proper leaf removal isn’t just about aesthetics—it’s about maintaining your plant’s overall health and resilience. A little precision now saves you from bigger problems later.
📚 In This Guide
- What you need
- Instructions
- Tips and common mistakes
- Wrapping up and next steps
What you need
- ● Sharp pruning shears or scissors: Sterilized, with clean, sharp blades (avoid dull tools—they crush plant tissue). Size: Small-handled shears (for precision) or bypass pruners (for thicker stems).
- ● Rubbing alcohol (70% or higher) or hydrogen peroxide (3%): For sterilizing tools before and after each cut. Quantity: Small bottle or spray bottle.
- ○ Gloves (optional but recommended): Nitrile or latex gloves to protect against sap, bacteria, or thorns. Tip: Use disposable gloves if working with toxic plants (e.g., oleander).
- ● Leaf or branch to remove: Target a leaf showing signs of disease (spots, mold), pest infestation, or physical damage.
- ● Disposable bag or container: For safely disposing of the cut-out leaf (prevents cross-contamination).
- ● Hand lens or magnifying glass: To inspect leaves for tiny pests or early disease signs.
- ● Pruning sealant (e.g., tree wound dressing): For sealing larger cuts on woody plants (like roses or fruit trees). Note: Skip for most houseplants—air-drying is best!
- ● Spray bottle with water: To mist the plant after pruning (helps reduce stress).
- ● Notebook & pen: To log which leaves you removed and track plant recovery.
Step-by-Step guide to pruning leaves for plant health
Here's how to remove leaves precisely while keeping your plant thriving.
✂️ Step 1: Choose the Right Tools for Clean Cuts
Use sharp, sterilized pruning shears or scissors to avoid tearing leaf tissue. I always wipe the blades with rubbing alcohol before cutting—this prevents spreading disease between plants. For delicate leaves like those on ferns or calatheas, snip just above the leaf stem where it meets the main stem. The cut should be clean, not jagged.
If you're working with larger leaves (think hostas or coleus), grab a small pair of scissors instead of shears. You'll see less damage to surrounding foliage when you make precise cuts close to the stem. Never use your fingers—you risk crushing the stem or leaving ragged edges that invite infection.
🌿 Step 2: Identify Leaves That Need Removal
Focus on leaves that are yellow, brown, or spotted—these are signs of disease, pests, or natural aging. I also remove leaves that block light from reaching lower growth, especially on bushy plants like impatiens or fuchsias. Healthy leaves should be firm, green, and free of holes or discoloration.
Check the underside of leaves for webbing, eggs, or tiny insects—this is your signal to remove that leaf immediately. Even if the top looks fine, hidden pests will spread to other leaves. For variegated plants, avoid removing leaves with white or yellow patterns unless they're clearly damaged.
✂️ Step 3: Make the Cut at the Correct Angle
Position your tool at a 45-degree angle about ¼ inch above where the leaf meets the stem. This angle prevents water from pooling on the cut, which could rot the stem. For small stems, a straight cut works fine, but the angled cut is best for thicker growth like on roses or citrus trees.
Don't cut too close to the main stem—you'll damage the plant's vascular system. If you accidentally cut too deep, dip the cut end in cinnamon powder (a natural antifungal) and let it dry for a few hours before watering. You'll see new growth emerging from the stem in about 2-3 weeks if the cut was made correctly.
💧 Step 4: Clean Up and Monitor the Plant
After removing leaves, toss them in the trash—not your compost bin. Diseased leaves can spread pathogens, and pests might hitch a ride back to your garden. Wipe down your tools again with alcohol to sterilize them before storing.
Water the plant lightly 24 hours after pruning to give the cuts time to seal slightly. Watch for new growth in the next 1-2 weeks—this tells you the plant is recovering well. If you see wilting or yellowing near the cut area, the cut may have been too deep or the plant was stressed.
🌱 Step 5: Encourage Healthy Regrowth
Boost the plant's recovery by applying a balanced, water-soluble fertilizer 1 week after pruning. I use a 10-10-10 mix diluted to half strength—this gives the plant nutrients without overwhelming it. Avoid heavy fertilizers right after cutting, as they can stress the plant further.
Keep the plant in bright, indirect light for the first week post-pruning. Too much direct sun can scorch new growth, while too little light slows recovery. You'll notice stronger, healthier leaves emerging from the stem within 3-4 weeks, signaling the plant is thriving again.
Tips & tricks for perfect leaf pruning
Here's what nobody tells you—these little details make all the difference when your plant's health is on the line.
Tool Selection Matters: Beyond just using sharp tools, I’ve learned that the right tool for the job prevents hidden damage. For plants with thick, waxy leaves like succulents, a small, sharp knife works better than shears—it gives you more control over the cut. And if you’re working with delicate plants like orchids, switch to clean, sharp scissors to avoid crushing the stems. Always sterilize your tools between plants to prevent cross-contamination of diseases.
The 45-Degree Angle Secret: That 45-degree angle in Step 3 isn’t just about aesthetics—it’s about water runoff. When you make the cut at this angle, rainwater and excess moisture slide right off, reducing the risk of rot. For smaller stems, a straight cut is fine, but for anything thicker than a pencil, the angled cut is your best defense against stem rot. Pro tip: Practice on paper first to get the feel of the angle before you start pruning.
Post-Pruning Care is Critical: The 24-hour wait before watering in Step 4 isn’t arbitrary—it gives the plant time to seal the wound naturally. If you water immediately, you risk introducing bacteria or fungi into the fresh cut. After pruning, I like to mist the plant lightly with water mixed with a bit of cinnamon (just a pinch) to add an extra layer of protection against infection. This simple step has saved more plants from stress than I can count.
Monitor for Stress Signs: Watching for new growth in the 1-2 weeks after pruning is your best indicator of success. If you see wilting or yellowing near the cut area, it’s a red flag—either the cut was too deep, or the plant is struggling to recover. In that case, trim back any additional leaves nearby to reduce stress on the plant. Healthy recovery usually shows up as new buds forming within 3-4 weeks, so keep an eye out for those signs of progress.
Pro Tips for Cut Out A Leaf
- Here's what nobody tells you—these little details make all the difference when your plant's health is on the line.
- Tool Selection Matters: Beyond just using sharp tools, I’ve learned that the right tool for the job prevents hidden d...
- The 45-Degree Angle Secret: That 45-degree angle in Step 3 isn’t just about aesthetics—it’s about water runoff. When ...
Frequently asked questions
Got questions about cutting out a leaf? You’re not alone! Here are answers to the most common concerns—whether you’re dealing with pests, disease, or just curious about the best way to do it.
Can I cut out a leaf at any time of year?
Timing matters! Aim for spring or early summer when your plant is actively growing. Avoid pruning in winter or extreme heat—this stresses the plant and slows recovery. If you must remove a diseased leaf in fall, do it early in the season before dormancy sets in.
What’s the best tool for cutting out a leaf?
Use clean, sharp pruning shears or scissors for larger leaves, and sterilized snips for precision work. Avoid dull tools—they crush stems and invite infections. For small leaves, even sharp nail clippers work in a pinch! Always disinfect tools with rubbing alcohol before and after use.
How do I prevent my plant from getting infected after cutting?
Infection risks spike if tools or wounds aren’t clean. Wipe the cut area with rubbing alcohol (70% or higher) after removal. Avoid overwatering the plant for 3–5 days post-prune, and consider applying a fungicide if the leaf had fungal spots. Healthy airflow helps too—trim nearby foliage if needed.
Will cutting out a leaf harm my plant?
Not if done right! Removing 1–2 healthy leaves (especially older ones) can boost growth by redirecting energy. But avoid cutting more than 10–15% of the foliage at once—this can shock the plant. Diseased or pest-ridden leaves? Always remove them to protect the rest!
What if the leaf keeps growing back?
Some plants (like ivy or certain succulents) regrow stubbornly from the stem. If this happens, cut deeper—about ¼ inch below the leaf base—or use a horticultural sealant to prevent regrowth. For stubborn cases, repeat the process until the leaf stops returning.
| Quick Fixes | When to Use |
|---|---|
| Rubbing alcohol wipe | After cutting to sterilize wounds |
| Pruning sealant | For large stems or woody plants |
| Neem oil spray | If pests were on the removed leaf |
Wrapping up and next steps
Cutting out a diseased or damaged leaf is a simple yet powerful way to keep your plants thriving! With the right tools, a steady hand, and a little patience, you can restore your plant’s health and prevent further issues.
Remember, precision matters—always disinfect your tools and remove leaves early to stop pests or diseases in their tracks.
Now that you’re ready to act, take the next step! Monitor your plant’s progress after pruning and adjust your care routine as needed. Happy gardening—your green friends will thank you! 🌿✨