
Leaf Blower
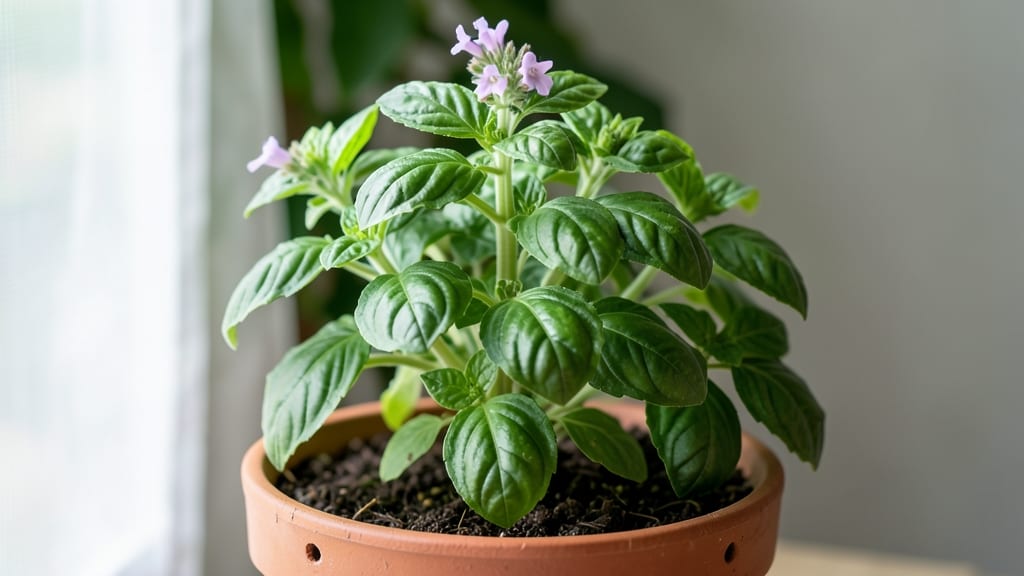
Curly leaf basil thrives where regular basil wilts—on my kitchen windowsill through winter, producing tender leaves all season long. 🌱 The secret lies in its compact growth habit and tolerance for cooler temperatures, making it the ultimate low-maintenance herb for cooks and gardeners alike.
Unlike its flat-leaf cousin, curly basil handles indoor conditions better and stays productive with minimal pruning. You’ll harvest fresh leaves for pesto, salads, and sandwiches without the fuss of frequent trimming—just snip what you need as you go.
The fragrant, crinkled foliage also adds visual charm to containers, making it a dual-purpose plant for both kitchen and garden.
📚 In This Guide
- What you need
- Instructions
- Tips and common mistakes
- Wrapping up and next steps
What you need
- ● Curly leaf basil seeds or seedlings: Start with Ocimum basilicum var. crispo seeds (or seedlings from a nursery). Aim for 3–5 plants for a small harvest.
- ● Well-draining potting mix: 1–2 gallons per plant (use a blend of peat moss, perlite, and compost for optimal aeration).
- ● Containers: Pots with drainage holes (6–12 inches in diameter). Terracotta or fabric grow bags work best.
- ● Slow-release fertilizer: A balanced, organic option (e.g., 10-10-10 or fish emulsion) to nourish roots over time.
- ● Watering can or spray bottle: For gentle hydration—avoid soggy soil!
- ● Pruning shears: Sharp, clean scissors (or small gardening knives) to trim stems without crushing.
- ○ Gloves (optional): Protect your hands from soil and sap.
- ● Sunlight access: A sunny windowsill (6+ hours of light/day) or a grow light for indoor setups.
- ○ Humidity tray (optional): A shallow tray with pebbles and water to boost moisture in dry climates.
- ● Harvesting container: A small bowl or basket to collect fresh leaves.
- ● 🌡️ Temperature: Keep soil between 70–80°F (21–27°C)—basil loves warmth!
- ● ✨ Soil pH: Aim for 6.0–7.0 (test with a kit if needed).
- ● 🔥 Containers: Elevate pots to prevent root rot—never let basil sit in water!
Step-by-step instructions for growing curly leaf basil
Here's how to cultivate lush, flavorful curly leaf basil that keeps producing all season with minimal effort.
🌱 Step 1: Select the Perfect Location and Soil
Curly leaf basil thrives in full sun—at least 6-8 hours of direct sunlight daily. Choose a spot that gets morning sun and afternoon shade in hot climates, or full sun all day in cooler regions. The leaves will curl even more in intense heat, but the flavor remains rich.
Use well-draining potting mix (never garden soil) to prevent root rot. I like to add a handful of perlite to the mix for extra aeration. The soil should hold moisture but never feel soggy—think of a wrung-out sponge. Test by squeezing a handful: if water drips out, it's too wet.
🪴 Step 2: Plant Seeds or Transplants at the Right Time
Start seeds indoors 8-10 weeks before your last frost date or sow directly in the garden after all danger of frost has passed. Plant seeds ¼ inch deep, spacing them 12-18 inches apart—they need room to grow bushy. If using transplants, dig holes slightly larger than the root ball and place them at the same depth they were growing before.
Water gently after planting to settle the soil. Avoid overwatering now—you'll see first true leaves in 7-14 days. If you're growing in containers, use pots at least 6 inches deep with drainage holes. Curly leaf basil grows well in groups, so a 12-inch diameter pot can comfortably hold 2-3 plants.
☀️ Step 3: Provide Consistent Care for Optimal Growth
Water basil when the top inch of soil feels dry to the touch. Stick your finger in—if it's dry, water deeply until it runs out the drainage holes. Avoid wetting the leaves to prevent fungal diseases like downy mildew. I water at the base early in the morning so the foliage dries quickly.
Fertilize lightly every 2-3 weeks with a balanced liquid fertilizer (10-10-10 or 20-20-20). Too much nitrogen makes leaves soft and less flavorful. You'll know it's working when you see new growth at the stem nodes—this is where your basil will branch out and stay bushy.
✂️ Step 4: Prune Strategically for Continuous Harvests
Pinch off the top set of leaves when the plant reaches 6 inches tall. This encourages branching and a fuller bush. You'll see side shoots emerge within 7-10 days. Regular pruning keeps the plant compact and prevents it from flowering too soon—once it bolts, the leaves become bitter.
Harvest leaves by snipping the top 2-3 inches of stems with clean scissors. Always cut above a leaf node (the bump where leaves grow). The plant will regrow from that point. If you notice flower buds, snip them immediately—they signal the end of the harvest season. Curly leaf basil tastes best when harvested young and tender.
⏰ Step 5: Overwintering for Year-Round Growth
Before the first frost, move potted basil indoors to a sunny windowsill or under grow lights for 12-14 hours daily. Reduce watering slightly—soil stays moist longer indoors. If growing in the ground, harvest all leaves before frost and pot up your healthiest plants to bring inside.
In winter, basil grows slower but stays productive. Prune lightly every 4-6 weeks to maintain shape. You'll notice slower growth but still get fresh leaves for cooking. With proper care, your curly leaf basil can thrive indoors through winter and be ready to go back outside in spring.
Tips & tricks for perfect curly leaf basil cultivation
These game-changing strategies will help your curly leaf basil thrive with minimal effort while maximizing flavor and yield.
Light Management: If you're growing in hot climates, provide afternoon shade to prevent leaf scorching. I've seen basil leaves curl dramatically in intense afternoon sun, but the flavor actually intensifies from the stress response. Just monitor closely—if leaves start yellowing, move to partial shade immediately. The 6-8 hours of morning sun remains critical for photosynthesis, but afternoon protection prevents heat damage.
Soil Aeration Secret: The perlite I mentioned isn't just for drainage—it creates air pockets that prevent compacted soil. Packed soil suffocates roots and leads to root rot. I like to mix in vermiculite too (50/50 perlite to vermiculite) for even better moisture retention without compacting. Test your soil mix by squeezing—it should hold shape but crumble easily when released.
Timing Your Transplants: Those 8-10 weeks before last frost aren't arbitrary—they account for basil's slow germination. Start seeds indoors under grow lights if your climate has a long growing season. For direct sowing, wait until soil temperatures reach at least 50°F. Cold soil slows germination to a crawl, and seedlings may rot before emerging. I've had better luck with transplants in cooler climates because they establish faster than seeds.
Pruning Payoff: The 7-10 days it takes for side shoots to appear after pinching is worth the wait. This is when your plant develops its signature bushy shape. I recommend using clean scissors or your fingers to pinch—never tear leaves, as this damages stems. For maximum harvests, prune every 4-6 weeks throughout the growing season, always cutting just above leaf nodes. This encourages continuous regrowth from the base.
Pro Tips for Curly Leaf Basil
- These game-changing strategies will help your curly leaf basil thrive with minimal effort while maximizing flavor and...
- Light Management: If you're growing in hot climates, provide afternoon shade to prevent leaf scorching. I've seen bas...
- Soil Aeration Secret: The perlite I mentioned isn't just for drainage—it creates air pockets that prevent compacted s...
Frequently asked questions
Got questions about growing curly leaf basil?
You’re not alone! Here are answers to the most common queries to help you cultivate this fragrant herb like a pro.
How often should I harvest curly leaf basil to keep it bushy?
Harvest curly leaf basil regularly—about every 2–3 weeks—to encourage new growth. Pinch off the top sets of leaves (above a pair of leaves) when stems reach 6 inches tall. This pruning trick prevents legginess and keeps your plant lush and productive.
Can I grow curly leaf basil indoors year-round?
Curly leaf basil thrives indoors with 6–8 hours of sunlight daily (a sunny windowsill or grow lights work). Keep soil moist but well-draining, and rotate the pot weekly for even growth. Just avoid drafts—this herb hates cold surprises! →
What’s the best way to revive wilted curly leaf basil?
Wilted basil often means thirst or heat stress. Trim damaged leaves, move it to shadier spot, and water deeply at the base (avoid soggy soil). If roots are mushy, repot in fresh soil. With TLC, it’ll bounce back—just like your cooking inspiration!
Is curly leaf basil different from regular basil in taste or use?
Not much! Both have the same sweet, peppery flavor, but curly leaf basil’s ruffled edges make it prettier for garnishes (think pesto, salads, or pasta). Use them interchangeably—just adjust quantities if the leaves are smaller.
Why are my curly leaf basil leaves turning yellow?
Yellow leaves usually signal overwatering or nutrient deficiency. Let soil dry slightly between waterings, and fertilize lightly with balanced liquid fertilizer every 4–6 weeks. If lower leaves yellow first, it’s likely natural aging—trim them to redirect energy upward!
Wrapping up and next steps
Growing curly leaf basil is a rewarding journey that brings fresh, fragrant herbs to your kitchen with minimal effort!
Whether you’re a seasoned gardener or a beginner, this versatile plant thrives with just a little care—bright light, consistent watering, and occasional pruning. Your green thumb (or curious fingers!) can now enjoy year-round harvests, from pesto to teas.
Ready to elevate your herb game? Start small: Try growing one pot indoors or on your balcony, and soon, you’ll be sharing your lush basil with neighbors or experimenting with bold recipes. Happy growing! 🌱✨