
Planting
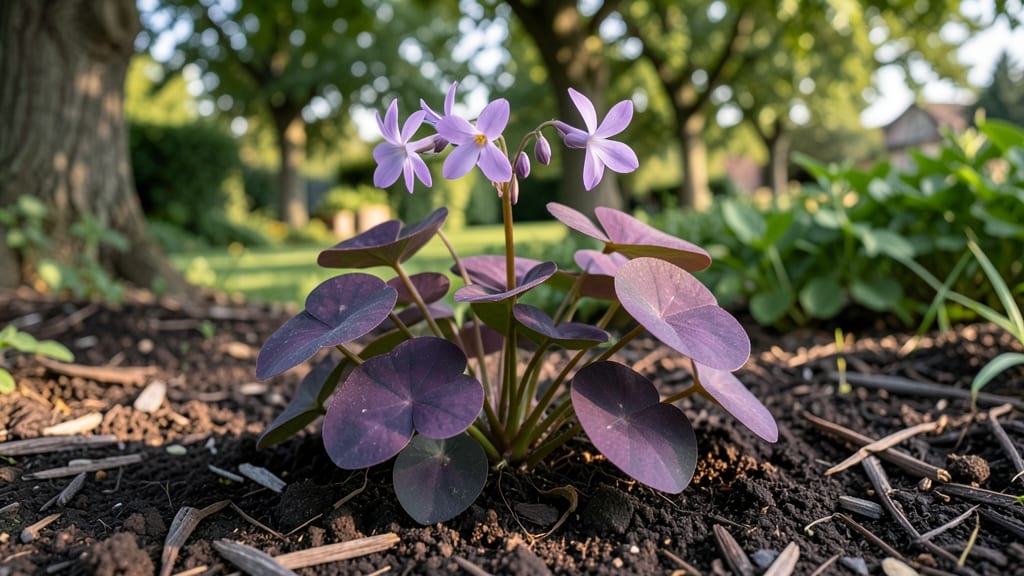
That little clover leaf plant creeping through your lawn isn't just a weed—it's a pollinator magnet and ground cover superstar waiting to be harnessed. 🌱 I've turned patches of white clover into lush, low-maintenance green carpets that outperform grass in shade, suppress weeds, and even improve soil.
The secret? Treating it like the intentional plant it is, not an annoyance. Most people overlook clover because they don't realize how versatile it is. You can mow it like grass, let it flower for bees, or harvest the young leaves for tea—all from the same plant.
The key is matching it to the right spot: partial sun to full shade, well-drained soil, and just enough water to keep it vibrant (not soggy). Once established, it thrives on neglect, making it perfect for busy gardeners.
By summer's end, you'll have a dense, weed-blocking mat that stays green when lawns brown out. The flowers attract bees and butterflies, and the roots fix nitrogen in the soil—basically free fertilizer for your other plants. It's the ultimate no-fuss ground cover that actually improves your garden.
Works as a lawn alternative, between stepping stones, or as a living mulch for vegetable beds. Here's how to make the most of it without losing your lawn (or your sanity).
📚 In This Guide
- What you need
- Instructions
- Tips and common mistakes
- Wrapping up and next steps
What you need
- ● Clover leaf plant cuttings or seeds: 3–5 healthy cuttings (4–6 inches long) or 10–20 seeds (if starting from scratch). Look for disease-free, vibrant green stems!
- ● Well-draining potting mix: 2–3 gallons (for containers) or enough to fill your garden bed. A blend of peat moss, perlite, and compost works wonders.
- ● Containers or garden space: Containers: 5–10-inch pots (with drainage holes) or hanging baskets (8+ inches deep). Terracotta or fabric pots are great choices!
- ● Garden beds: Full sun to partial shade (4+ hours of light daily). Ensure soil drains well—clover leaf plants hate soggy roots!
- ○ Rooting hormone (optional but helpful): A small jar or powder to encourage faster root growth.
- ● Pruning shears or sharp scissors (for trimming cuttings).
- ● Small hand trowel (for planting).
- ● Watering can or spray bottle (for gentle hydration).
- ● Gloves (to protect your hands from prickly stems or soil).
- ● Mulch (like straw or shredded leaves) to retain moisture.
- ● Slow-release fertilizer (like 10-10-10) for a nutrient boost.
- ● Support stakes or trellis (if training vines vertically).
- ● Lightweight netting (to protect young plants from pests).
- ● pH test kit (to check soil acidity—ideal range: 6.0–7.0).
Step-by-step guide to growing compact clover leaf plants
Here's how to cultivate lush, manageable clover leaf vines that keep producing all year.
🌱 Step 1: Choose the Right Variety and Location
Start with a compact clover leaf variety like 'Dwarf Clover' or 'Miniature Sweet Clover'—these stay under 3 feet tall and thrive in containers or small garden plots. Look for a spot with partial shade (morning sun, afternoon shade) to prevent leaf scorch, especially in hotter climates. I always test the soil first with a simple pH test kit—clover leaf plants prefer a slightly acidic to neutral range of 6.0-7.0.
If your soil is heavy clay, mix in 2 inches of compost to improve drainage before planting. The key here is avoiding waterlogged roots, which lead to yellowing leaves and stunted growth. A raised bed or well-draining container works perfectly if your native soil is too dense. Real talk: I've seen clover leaf plants struggle in soggy soil, so don't skip this prep step.
☀️ Step 2: Plant at the Right Time and Depth
Plant your clover leaf cuttings or young plants in early spring after the last frost date in your zone, or in late summer for a fall harvest. Dig a hole just slightly wider than the root ball but no deeper—the top of the root ball should sit flush with the soil surface. Press the surrounding soil gently to remove air pockets, then water deeply to settle everything.
Space plants 12-18 inches apart in the garden or 6-8 inches apart if growing in containers. This gives them room to spread without competing for nutrients. I like to plant mine in clusters of three for a fuller look, but don't crowd them—too many plants in one spot leads to weak, leggy growth. Watch for the first set of true leaves (not the initial seed leaves) to appear within 2-3 weeks—that's your sign they're established.
💧 Step 3: Water Consistently Without Overdoing It
Water your clover leaf plants once a week during the first month, then adjust based on rainfall and temperature. The soil should feel moist but not soggy—stick your finger 1 inch deep into the soil. If it feels dry, it's time to water. Overwatering is the fastest way to kill these plants, so resist the urge to water daily, even if the leaves look wilted. They bounce back quickly once the soil dries out a bit.
For containers, check the moisture level daily in hot weather—pots dry out much faster than garden soil. I've found that mulching around the base with 2 inches of shredded bark helps retain moisture and keeps roots cool. Avoid wetting the leaves when watering, as this can lead to fungal issues. Water at the base in the morning so the foliage has time to dry before evening.
✂️ Step 4: Prune for Compact Growth and Continuous Harvest
Regular pruning is what keeps clover leaf plants compact and encourages new growth. Pinch back the tips of new shoots when they reach 4-6 inches tall to promote bushier growth. This is the moment that matters: if you skip pruning, your plants will grow tall and leggy, with fewer leaves for harvest. Use clean, sharp pruning shears to avoid damaging the stems.
Harvest leaves as needed by snipping individual leaves or small stems just above a set of leaves. Never take more than one-third of the plant at a time—this ensures it keeps producing. I like to harvest in the morning when the leaves are at their freshest. After each harvest, give the plant a light fertilizer with a balanced 10-10-10 formula to replenish nutrients. This keeps the growth steady and the leaves flavorful.
🌿 Step 5: Overwinter for Year-Round Production
To keep your clover leaf plants producing through winter, protect them from frost. In colder climates, move container-grown plants to a sheltered spot or bring them indoors near a bright window. If growing in the ground, mound 4-6 inches of mulch around the base to insulate the roots. I've successfully overwintered clover leaf plants in a garage with a grow light for 12 hours a day, keeping them going until spring.
Reduce watering in winter—soil stays moist longer in cooler temperatures. Check the soil every 2-3 weeks and water only if it feels dry. Prune lightly in late winter to remove any dead or damaged growth. With proper care, your clover leaf plants will reward you with fresh leaves well into the new growing season. Here's the thing—consistent care in winter sets you up for a stronger, more productive plant in spring.
Tips & tricks for perfect compact clover leaf vines
A few simple tricks that'll keep your clover leaf plants thriving year-round without taking up too much space.
Soil Prep Secret: Confession: I skipped the soil test for years and wondered why my plants struggled. That 2-inch layer of compost isn't just about drainage—it also introduces beneficial microbes that help roots absorb nutrients more efficiently. For containers, mix compost directly into the potting soil rather than just adding it on top. This ensures even distribution throughout the root zone, which is especially important for compact varieties that don't have room to spread.
Planting Placement: The 12-18 inch spacing in the garden instructions is perfect, but here's what nobody tells you—plant in a slight arc rather than straight rows. This creates natural airflow between plants while maximizing sunlight exposure for each one. For containers, use at least 12-inch pots to prevent root binding, which stunts growth. I've found that terracotta pots actually help regulate moisture better than plastic during hot summers.
Watering Wisdom: That "moist but not soggy" rule is critical, but here's how to test it properly: press your finger into the soil—if it feels like a damp sponge, you're good. If it's completely dry at 1 inch deep, water thoroughly until it runs out the drainage holes. For containers, I've started using self-watering pots with a moisture meter probe to avoid the guesswork entirely. The probe gives me an exact reading, which eliminates those "is it dry enough?" moments that lead to overwatering.
Pruning Precision: When you pinch back those 4-6 inch shoots, aim to remove just the top set of leaves. This encourages branching from lower nodes while keeping the plant compact. I've noticed that using your fingers for this task actually works better than pruning shears—it gives you more control over the exact pinch point. After pruning, give your plants a light spray of water to reduce stress on the freshly cut stems. This simple step can make a noticeable difference in how quickly they recover and start new growth.
Pro Tips for Clover Leaf Plant
- A few simple tricks that'll keep your clover leaf plants thriving year-round without taking up too much space.
- Soil Prep Secret: Confession: I skipped the soil test for years and wondered why my plants struggled. That 2-inch lay...
- Planting Placement: The 12-18 inch spacing in the garden instructions is perfect, but here's what nobody tells you—pl...
Frequently asked questions
Got questions about growing and maintaining your clover leaf plant? You’re not alone! Here are some of the most common queries—plus quick, practical answers to keep your compact vines thriving year-round.
How do I encourage my clover leaf plant to grow bushier?
Prune the tips of the vines regularly to promote lateral growth. Pinch back the main stems just above a leaf node, and your plant will reward you with denser foliage. For extra bushiness, fertilize lightly with a balanced, water-soluble formula every 4-6 weeks during the growing season.
When is the best time to harvest clover leaves?
Harvest young, tender leaves anytime they’re 2-4 inches long for the best flavor and texture. For a continuous harvest, pick leaves in the morning after dew has dried but before the heat of the day sets in. Avoid over-harvesting—never take more than one-third of the plant at once to ensure regrowth.
Can clover leaf plants survive winter in cold climates?
Most clover leaf varieties are hardy down to Zone 3-4, but a thick layer of mulch (straw or shredded leaves) will protect roots from freezing. In containers, move pots to a sheltered spot or indoors if temperatures drop below 20°F. Evergreen varieties like Trifolium repens handle cold better than annual types.
What pests should I watch for, and how do I treat them?
Common pests include aphids, spider mites, and slugs. For aphids, blast them off with water or use insecticidal soap. Spider mites? Increase humidity and spray leaves with neem oil. Slugs hate diatomaceous earth—sprinkle it around the base of your plants at dusk. Prevention tip: Encourage beneficial insects like ladybugs to visit your garden!
Are there any low-maintenance alternatives to clover leaf plants?
If you’re after similar greens with less fuss, try microgreens (like radish or broccoli) or amaranth. Both grow quickly, require minimal space, and are packed with nutrients. For a perennial option, consider comfrey—it’s hardy, spreads easily, and thrives in poor soil.
Still stumped? Drop your question in the comments—we’re happy to help your clover leaf plant flourish!
Wrapping up and next steps
The clover leaf plant is a game-changer for compact gardens, offering year-round harvests with minimal space! Whether you're a seasoned gardener or just starting, these versatile vines deliver flavor, beauty, and low-maintenance rewards. 🌱
Ready to unlock your green thumb’s potential? Start small—plant a few vines in a pot or along a trellis—and watch your harvest grow! 🌿 Try one tip today and turn your balcony or patio into a thriving edible oasis.