
Trees
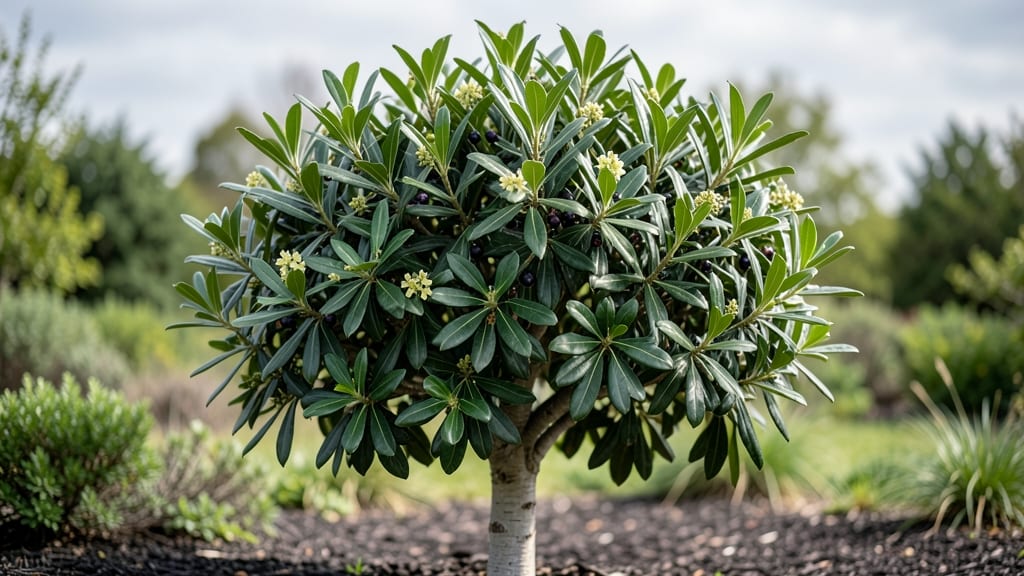
Growing bay leaf trees from dwarf varieties lets you harvest fresh leaves year-round—right on your patio. 🌿 These compact trees thrive in containers, making them perfect for small spaces or urban balconies, and their fragrant foliage doubles as a kitchen staple.
The key is matching their Mediterranean roots with the right soil, sunlight, and watering routine to keep them productive and pest-free.
You’ll need well-draining potting mix, a container with drainage holes (at least 12 inches deep), and a sunny spot that gets 6+ hours of light daily. Dwarf varieties like ‘Tiny’ or ‘Little Leaf’ stay under 6 feet tall, so they won’t outgrow most patios.
Prune lightly after harvest to encourage bushier growth, and pinch back leggy stems to maintain shape—this keeps the tree compact and full of flavorful leaves.
Once established, these trees reward you with abundant harvests all year (in warmer climates) or as a perennial in containers. The leaves stay aromatic and tender longer than store-bought, and you’ll never run out when making soups, stews, or marinades.
Even beginners can master this—just avoid overwatering, and your tree will thrive for years.
Container-grown bay leaf trees also double as striking ornamentals, with their glossy, dark green leaves adding texture to any outdoor space. If pests like spider mites appear (common in dry conditions), a simple spray of neem oil or insecticidal soap keeps them at bay.
With the right care, your dwarf bay tree becomes both a kitchen garden and a living centerpiece.
📚 In This Guide
- What you need
- Instructions
- Tips and common mistakes
- Wrapping up and next steps
What you need
- ● Dwarf bay leaf tree (Laurus nobilis 'Angustifolia' or similar): 1 healthy sapling (3–5 gallons container size at purchase)
- ● Large container: 15–20 gallon pot with drainage holes (ceramic or fabric preferred)
- ● Well-draining potting mix: 5–10 gallons of a blend with perlite/vermiculite (e.g., 60% potting soil, 30% perlite, 10% compost)
- ● Slow-release fertilizer: 1–2 cups of organic granular fertilizer (e.g., 10-10-10 or balanced NPK)
- ● Saucer or tray: 1 to catch drainage
- ● Pruning shears: Sharp, sterilized pair for shaping and maintenance
- ● Gloves: 1 pair (nitrile or leather for protection)
- ○ Mulch (optional): 1–2 inches of pine bark or shredded leaves for moisture retention
- ○ Support stake (optional): 1 bamboo or metal stake for young trees in windy areas
- ○ pH testing kit (optional): To monitor soil acidity (ideal: 6.0–7.0)
- ○ Misting bottle (optional): For humidity control in dry climates
How to grow dwarf bay leaf trees in containers
Here's my foolproof method for cultivating compact, fragrant bay leaf trees that produce abundant leaves without taking over your space.
🌱 Step 1: Select the Right Dwarf Variety and Pot
Choose a dwarf variety like 'Tiny Tower' or 'Sagittifolium', which stay under 6 feet tall while maintaining full flavor. These varieties are genetically compact and won't outgrow their container. Select a 15-20 gallon pot with drainage holes—bay trees despise soggy roots and will drop leaves if waterlogged.
I use unglazed terra cotta because it breathes and helps regulate moisture. Place 2-3 inches of coarse gravel at the bottom for drainage—this prevents soil compaction and ensures excess water flows away from the root zone. The pot should be at least 2 feet wide to accommodate the mature root spread of a dwarf variety.
☀️ Step 2: Prepare Well-Draining Soil Mix
Bay trees need fast-draining soil to prevent root rot. Mix 60% premium potting soil with 30% perlite and 10% coarse sand—this creates air pockets while retaining enough moisture. I avoid garden soil entirely; it compacts in containers and suffocates roots.
Fill the pot 2/3 full with your mix, leaving room for the root ball. Tap the container gently to settle the soil without compacting it. The goal is loose, fluffy texture that mimics the Mediterranean conditions bay trees evolved in. Add a slow-release fertilizer (10-10-10) at planting time for a steady nutrient supply.
🪴 Step 3: Plant and Stake for Stability
Remove the nursery plant from its container and loosen the roots gently if they're circling. Position the tree so the top of the root ball sits 1 inch below the pot rim—this prevents soil from washing over the roots during watering. Fill around the root ball with your prepared mix, pressing lightly to eliminate air pockets.
Bay trees have shallow but wide-spreading roots, so staking is essential for the first year. Use two 6-foot stakes placed diagonally and secure with soft garden ties. This prevents the top-heavy foliage from toppling in wind or when you harvest leaves. Water thoroughly after planting to settle the soil.
💧 Step 4: Establish Watering and Light Routines
Bay trees need consistent moisture but hate soggy soil. Water when the top 2 inches of soil feel dry—this usually means every 3-4 days in summer, less in winter. I use a moisture meter to check because bay trees wilt dramatically when thirsty but recover quickly once watered.
Place your tree in full sun (6+ hours daily)—a south-facing window or outdoor patio works best. Without enough light, leaves become sparse and flavorless. Rotate the pot quarter-turn weekly so the tree grows evenly. In winter, supplement with a grow light if indoor light fades below 12 hours daily.
✂️ Step 5: Prune for Shape and Leaf Production
Prune in late winter before new growth begins. Remove 1/3 of the oldest growth from the bottom to encourage bushier top growth. Cut just above a leaf node where new branches will emerge. This also makes harvesting easier—you'll always have fresh leaves at the top.
Harvest leaves by snipping individual leaves rather than cutting stems. Never take more than 1/3 of the foliage in one season—bay trees produce leaves slowly and need their canopy to photosynthesize. After pruning, fertilize lightly with fish emulsion to support new growth.
Tips & tricks for perfect dwarf bay leaf trees in containers
Growing these fragrant, compact trees successfully comes down to a few key details that most gardeners overlook—here’s what I’ve learned after watching my own thrive.
Pot Selection Wisdom: While the instructions call for a 15-20 gallon pot, I recommend upgrading to a 25-gallon container if you want to maximize leaf production. The extra space gives roots room to spread without becoming root-bound, which directly impacts how many leaves your tree produces annually. Terra cotta is ideal, but if you prefer plastic, add extra drainage holes—bay trees will forgive you, but they won’t thank you with abundant foliage.
Soil Mix Pro Tip: The 60-30-10 soil ratio in Step 2 is perfect, but here’s the secret: sterilize all components before mixing. Spread perlite and sand on baking sheets at 200°F for 30 minutes to kill any pathogens that could stress your tree. This extra step prevents the slow decline I’ve seen in trees planted with untreated soil—especially important if you’re reusing containers from previous plants.
Staking Strategy: Those 6-foot stakes in Step 3 sound excessive, but trust me—they’re worth it. Bay trees develop surprisingly top-heavy canopies, and without proper support, they’ll lean dramatically after just a few harvests. I’ve seen trees topple after their first winter without staking, even when potted. Use soft garden ties and check them monthly—they can cut into bark as the tree grows.
Light Optimization: The 6+ hours of daily sun is non-negotiable, but here’s how to maximize it: place your tree on a caster wheel base during summer months. This lets you rotate it toward the sun’s path throughout the day, giving all sides equal exposure. In winter, supplement with a full-spectrum LED grow light placed 12 inches above the canopy for 10 hours daily—this prevents the leggy growth I’ve seen in trees with insufficient winter light.
Pro Tips for Bay Leaf Trees
- Growing these fragrant, compact trees successfully comes down to a few key details that most gardeners overlook—here’...
- Pot Selection Wisdom: While the instructions call for a 15-20 gallon pot, I recommend upgrading to a 25-gallon contai...
- Soil Mix Pro Tip: The 60-30-10 soil ratio in Step 2 is perfect, but here’s the secret: sterilize all components befor...
Frequently asked questions
Got questions about growing bay leaf trees—especially those compact dwarf varieties perfect for containers?
Here are some of the most common queries (and answers!) to help you cultivate a thriving Laurus nobilis at home.
Can bay leaf trees grow in containers long-term?
Dwarf bay leaf trees (like 'Angustifolia' or 'Saratoga') thrive in containers for years if given proper care. Use a well-draining pot (at least 12–18 inches wide) with holes, and upgrade to a larger container every 2–3 years. Just ensure they get 6+ hours of sunlight daily and consistent moisture.
How cold-hardy are container-grown bay leaf trees?
Most bay leaf trees tolerate light frosts (20–25°F) but struggle below 15°F. For container varieties, move pots to a sheltered spot (like a garage or under eaves) when temps drop. If you live in Zone 7 or colder, consider overwintering indoors near a sunny window. Pro tip: Mulch the pot with straw for extra insulation!
Why are my bay leaves turning yellow or dropping?
Yellowing leaves often signal overwatering or poor drainage. Let the top 1–2 inches of soil dry out between waterings, and ensure your pot has drainage holes. Brown edges or crispy leaves? Underwatering or low humidity may be the culprit. Mist leaves occasionally or place the pot on a tray of pebbles and water for extra moisture.
Can I grow bay leaves from store-bought sprigs?
Yes! Snip a healthy sprig with a few leaves, strip the lower foliage, and place it in water or moist soil. Keep it in bright, indirect light and maintain humidity (a plastic bag works!). Roots should form in 4–6 weeks. Once established, transplant to a pot—just be patient, as it may take months to mature enough for harvesting.
What’s the fastest way to harvest leaves without harming the tree?
Pinch off individual leaves as needed (they regrow quickly!), but avoid stripping entire branches. For larger harvests, trim back 1/3 of the new growth in late spring or early summer. Never take more than 20–30% of the foliage at once—this keeps your tree lush and productive. Store leaves in the fridge for up to 2 weeks or dry them for long-term use.
Wrapping up and next steps
Growing bay leaf trees—especially dwarf varieties—is a rewarding journey that brings fragrant beauty and culinary potential right to your doorstep. Whether you’re a seasoned gardener or a beginner, these resilient plants thrive in containers with just a little care and attention.
Now that you’re armed with the right materials and answers to common questions, it’s time to roll up your sleeves and watch your little bay tree flourish!
🌱 Next steps:
- Pick your favorite dwarf variety and start planting today!
- Monitor your tree’s progress and adjust care as needed.
- Soon, you’ll be harvesting fresh leaves for homemade dishes or gifting them to fellow plant lovers.