
Pruning
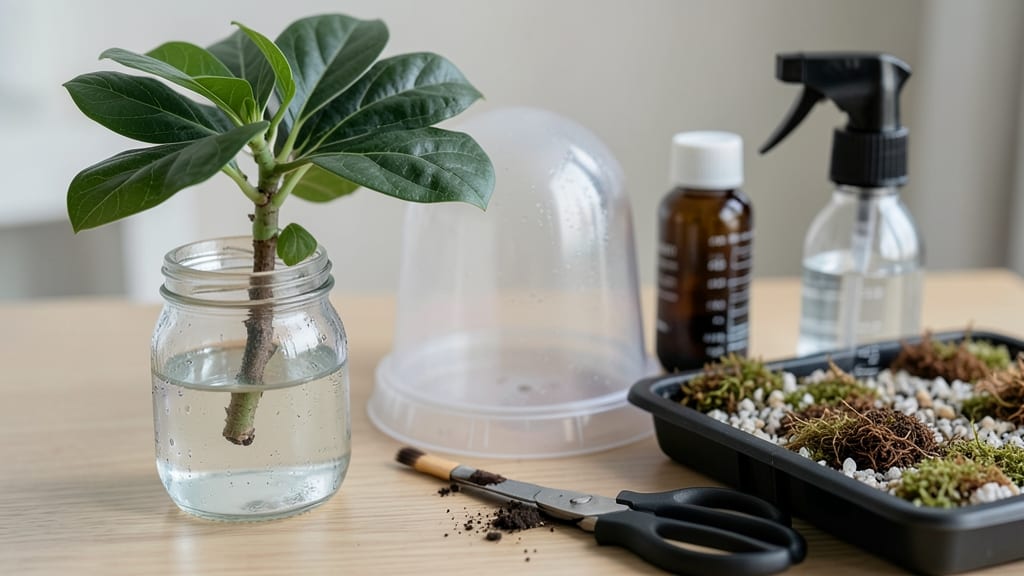
Propagating fiddle leaf fig from a single leaf cutting gives you a new plant for just a few dollars—and it’s easier than you think. 🌿 I’ve turned my one struggling plant into a small jungle using this method, and the key is patience paired with the right conditions.
The process mimics how these tropical trees grow in the wild, just without the waiting decades.
You’ll need sharp scissors, rooting hormone (optional but helpful), a small pot with well-draining soil, and a humidity dome or plastic bag to keep things cozy. The ideal spot is bright but indirect light—think east-facing window or under fluorescent grow lights.
Temperature should stay between 65-75°F, and humidity above 60% for best results. Most people overwater at this stage, so let the soil dry slightly between waterings.
Within 4-8 weeks, you’ll see tiny roots forming, and after 3-6 months, your cutting will be ready to transplant. The first leaves might look different—smaller, paler—but don’t worry, that’s normal. What matters is the strong, woody stem that tells you the plant is establishing itself properly.
Once it’s stable, treat it like your original plant, and you’ll have a thriving fiddle leaf fig in no time.
This method works best in spring or summer when the plant is actively growing, but you can try it year-round with a little extra care. The biggest mistake? Using old, yellowing leaves or cuttings that are too small—stick to healthy, mature leaves with a portion of the stem attached.
With the right setup, your success rate will be 80% or higher, even if you’ve struggled before.
📚 In This Guide
- What you need
- Instructions
- Tips and common mistakes
- Wrapping up and next steps
What you need
- ● Healthy fiddle leaf fig leaves: 3–5 mature, disease-free leaves (preferably from recent pruning).
- ● Sharp pruning shears or scissors: Clean, sterilized tools to make precise cuts (avoid tearing the leaf stem!).
- ○ Rooting hormone (optional but recommended): A small jar of rooting powder or gel (e.g., Clonex or Dip ‘N Grow).
- ● Well-draining potting mix: A 50/50 blend of perlite or vermiculite and coco coir or peat moss (sterilized).
- ● Small pots or propagation trays: 2–4" pots with drainage holes (or a clear plastic tray with holes for humidity).
- ● Plastic wrap or humidity dome: To retain moisture (e.g., a plastic bag with holes or a propagator lid).
- ● Spray bottle: Filled with room-temperature water (avoid tap water if it’s chlorinated).
- ● Labeling tags: To track leaf cuttings (e.g., toothpicks + masking tape).
- ● Warmth: Keep cuttings in a spot with 65–75°F (18–24°C) temperatures (e.g., a sunny windowsill or under grow lights).
- ● Indirect light: Bright, filtered light (avoid direct sun, which can scorch leaves).
- ● Humidity: Aim for 70–80% humidity (use a hygrometer if needed).
- ● Grow lights: LED or fluorescent lights for consistent lighting if natural light is limited.
- ● Fungicide spray: Pre-mixed solution (e.g., Neem oil) to prevent mold or rot.
- ● Heat mat: For faster rooting in cooler climates (set to 70–75°F).
- ● Journal/notebook: To log progress (root growth, watering dates, etc.).
Step-by-Step instructions for propagating fiddle leaf fig using leaf cuttings
Here's how to multiply your fiddle leaf fig collection with minimal fuss—even if you've failed before.
🌿 Step 1: Select and Prepare Healthy Leaves
Choose mature leaves with at least 3-4 nodes (the small bumps where roots and new growth emerge). Look for leaves that are slightly stiff but still flexible—avoid brittle or yellowing ones. I like to work with leaves that have fallen naturally or been gently removed during routine pruning.
Use clean, sharp scissors or pruning shears to cut each leaf just below a node at a 45-degree angle. This angled cut increases surface area for root development. Handle the leaves carefully—their waxy coating protects them, and any damage reduces success rates. Place the cuttings in a clean container while you prepare the propagation medium.
💧 Step 2: Create a Humid Propagation Environment
Fill a small container with 1-2 inches of distilled water—tap water can contain chlorine or minerals that inhibit root growth. I use a clear glass jar so I can monitor root development without disturbing the cuttings. Add a few drops of rooting hormone (optional but helpful) to the water to encourage faster root formation.
Place the cuttings in the water, ensuring that only the nodes (not the leaf blades) are submerged. The nodes need moisture to activate and form roots, while keeping the leaves dry prevents rot. Cover the container loosely with plastic wrap to maintain high humidity—fiddle leaf figs thrive in environments with 60-70% humidity.
☀️ Step 3: Position for Optimal Light and Temperature
Set your propagation container in a location with bright, indirect light. A north-facing window or under a grow light works best—direct sun can scorch the leaves while they're still developing roots. I place mine on a seedling heat mat set to 70-75°F to mimic tropical conditions and speed up root growth.
Change the water every 3-5 days to prevent bacterial growth. You'll see tiny white roots emerging from the nodes in about 2-4 weeks. Once roots reach 1-2 inches in length, your cuttings are ready for the next step. Be patient—some cuttings take longer, especially in cooler conditions.
🪴 Step 4: Transition to Soil and Care for New Plants
Prepare small pots with a well-draining mix of 50% peat moss and 50% perlite to prevent root rot. Gently remove the cuttings from the water, being careful not to damage the delicate roots. Plant each cutting so that the base of the leaf (where the roots were) is just below the soil surface.
Water lightly immediately after planting, then allow the top inch of soil to dry out before watering again. Keep the new plants in the same high-humidity environment for the first 2-3 weeks to reduce transplant shock. Gradually introduce them to normal room conditions over 1-2 weeks by removing the plastic wrap for increasing periods each day.
⏰ Step 5: Monitor Growth and Encourage Establishment
Your new fiddle leaf fig plants will need bright, indirect light and consistent care to thrive. You'll know they're establishing well when new leaves begin to form at the base of the original leaf blade. This can take 4-8 weeks, depending on light and temperature conditions.
Once the new growth reaches about 2-3 inches, you can remove the original leaf blade to redirect the plant's energy into growing a stronger stem. Keep the soil slightly moist but never soggy—fiddle leaf figs are sensitive to overwatering. With patience, you'll have a healthy new plant ready to join your collection in just a few months.
Tips & tricks for propagating fiddle leaf fig
Here's what nobody tells you about making this method work the first time—trust me, these details make all the difference.
Leaf Selection Intelligence: Look for leaves with at least 3-4 nodes that feel slightly stiff but still bend gently—these are your best bets. I've found that leaves with a slight yellowing at the base actually root faster because they've already begun the natural shedding process. Avoid leaves with brown spots or holes, as these often indicate disease or pest damage that can compromise your cutting's success.
Rooting Environment Secrets: The 1-2 inches of distilled water in Step 2 should be just enough to cover the nodes while keeping the leaf blades dry. I've had the most success using small glass jars because they allow me to monitor root development without disturbing the cuttings. For an extra boost, add a few drops of rooting hormone—it's optional but can cut your waiting time by nearly half. The key is maintaining that 60-70% humidity with the plastic wrap, but don't seal it completely—you want airflow to prevent mold.
Light and Temperature Strategy: That 70-75°F heat mat recommendation isn't just about speed—it's about mimicking the tropical conditions where fiddle leaf figs thrive naturally. If you don't have a heat mat, place your propagation container on top of your refrigerator (not inside) for gentle warmth. For light, I've noticed that east-facing windows provide the perfect balance of bright but indirect light—west-facing windows can get too harsh in the afternoon. Rotate your container every few days to ensure even light exposure.
Transplanting Wisdom: When you're ready to move your cuttings to soil in Step 4, handle those delicate roots with extreme care. I use a small spoon to gently loosen them from the water before transferring. The 50% peat moss and 50% perlite mix is perfect for preventing root rot, but if you're concerned about moisture retention, you can substitute the perlite with orchid bark. Water lightly immediately after planting, then let the top inch dry out completely before watering again—fiddle leaf figs hate soggy roots.
Pro Tips for Propogating Fiddle Leaf Fig
- Here's what nobody tells you about making this method work the first time—trust me, these details make all the differ...
- Leaf Selection Intelligence: Look for leaves with at least 3-4 nodes that feel slightly stiff but still bend gently—t...
- Rooting Environment Secrets: The 1-2 inches of distilled water in Step 2 should be just enough to cover the nodes whi...
Frequently asked questions
Got questions about propagating your fiddle leaf fig?
You’re not alone—this leaf-cutting method can feel tricky at first! Below, we’ve rounded up the most common concerns and quick fixes to keep your new plants thriving.
How do I know if my fiddle leaf fig cutting is ready to propagate?
A healthy cutting should have at least 2–3 nodes (those little bumps where leaves grow) and 2–4 mature leaves. Avoid overwatered or yellowing leaves—these can rot or fail to root. Pro tip: Snip just below a node at a 45-degree angle for better absorption!
How long does it take for fiddle leaf fig cuttings to root?
Patience is key! Most cuttings take 4–8 weeks to root, depending on humidity and warmth. Keep the soil moist (not soggy) and mist the leaves daily. Signs of success: Tiny new leaves or a slight tug resistance when gently pulling the cutting.
Why is my fiddle leaf fig cutting rotting after propagation?
Overwatering or poor drainage is usually the culprit. Fix it fast: Let the soil dry slightly between waterings, and ensure your pot has drainage holes. If mold appears, repot in fresh, sterile soil and reduce humidity. Pro tip: Use a mix of perlite and potting soil to prevent compacting.
Can I propagate fiddle leaf fig in water first, then transfer to soil?
Yes! Water propagation works for fiddle leaf figs, but transfer to soil within 2–4 weeks to avoid root shock. Use room-temperature water and change it every 3–5 days. Once roots hit 1–2 inches, plant in well-draining soil. Warning: Water roots can rot faster than soil roots!
What’s the best time of year to propagate my fiddle leaf fig?
Spring or early summer (when the plant is actively growing) is ideal! Avoid winter propagation—your fig will be dormant and less likely to root. If you must propagate in fall, keep conditions warm and humid to mimic growing season energy.
Wrapping up and next steps
Propagating your fiddle leaf fig from a simple leaf cutting is easier than you think—just follow the right steps, and you’ll soon have a thriving new plant! 🌱 With patience and a little care, you can expand your green space without breaking the bank.
Now that you’re armed with the know-how, why not give it a try? Start with a healthy leaf, set up your propagation station, and watch your plant family grow!
Pro tip: Document your progress with photos—it’s a fun way to track your success and share your journey with fellow plant lovers! 📸