
Pests and Diseases
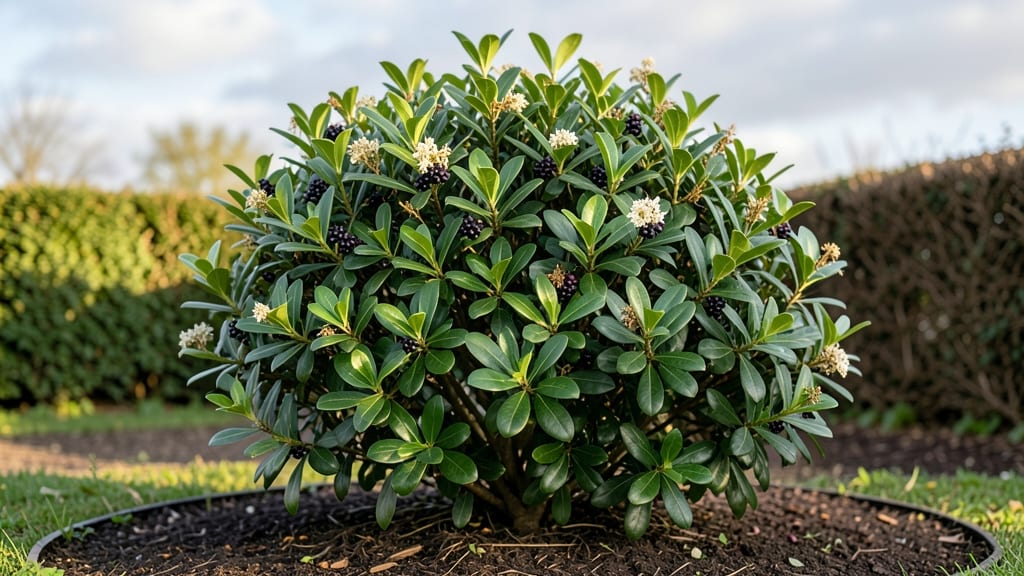
Growing oval leaf privet means year-round lushness that neighbors will envy. 🌿 This evergreen shrub thrives in zones 6-9, and once established, it handles drought, salt spray, and even urban pollution like a champ. The secret to that dense, glossy foliage?
Pruning at the right times—and I’ll show you exactly when and how. Most gardeners stop pruning after summer, but oval leaf privet rewards year-round trimming for thicker growth. Light pruning in late winter (before buds swell) removes dead wood, while summer pruning keeps it compact.
The result? A hedge so uniform it looks professionally landscaped—without the hourly labor. You’ll end up with a tidy, vibrant screen that blocks noise, wind, and unsightly views. It’s perfect for formal hedges, informal screens, or even as a standalone specimen.
Plus, it’s deer-resistant, which is a win in my book. For best results, plant in well-draining soil with morning sun and afternoon shade. Water deeply but infrequently once established—this shrub’s tougher than it looks. Let’s get yours thriving!
📚 In This Guide
- What you need
- Instructions
- Tips and common mistakes
- Wrapping up and next steps
What you need
- ● Hand pruners – Bypass pruners (for clean cuts on stems up to ½ inch thick).
- ● Loppers – For thicker branches (½ to 1½ inches).
- ● Pruning saw – For stubborn, woody stems (1½+ inches).
- ● Gloves – Heavy-duty gardening gloves (to protect from thorns and sap).
- ● Disinfectant (70% isopropyl alcohol or bleach solution) – For sterilizing tools between cuts.
- ○ Sharpie or permanent marker – To mark branches for removal (optional but helpful for planning).
- ● Heavy-duty trash bags or bucket – For collecting pruned debris (privet can be invasive—never compost!).
- ● Extension pole pruners – For high branches (saves time and backaches!).
- ● Hedge shears – If shaping a formal hedge (use for small, frequent trims).
- ● Pruning sealant – For large cuts (>1 inch) to prevent disease entry (controversial—skip if unsure!).
- ● Work gloves with wrist straps – Extra grip for slippery branches.
- ● Ladder or step stool – For reaching tall privet (prioritize safety!).
Step-by-step instructions for cultivating oval leaf privet
Here's how to nurture this versatile shrub into a lush, year-round privacy screen.
🌱 Step 1: Select and Prepare Planting Sites
Oval leaf privet thrives in full sun to partial shade, making it perfect for hedges along property lines. Choose sites with well-draining soil—this shrub won't tolerate soggy roots. I always test soil pH first; privet prefers 6.0-7.5, so I amend heavy clay with 2-3 inches of compost mixed into the top 6 inches of soil.
Dig holes twice as wide as the root ball but only as deep. Privet roots are shallow, and burying too deep suffocates them. Space plants 3-4 feet apart for a dense hedge or 6-8 feet for individual specimens. The wider spacing now prevents future overcrowding—trust me, you'll thank yourself when pruning season arrives.
💧 Step 2: Plant and Establish New Growth
Remove the plant from its container and loosen any circling roots with your fingers. Place it in the hole so the top of the root ball sits 1 inch below soil level—this prevents stem rot while encouraging root expansion. Backfill with native soil mixed with your compost amendment, tamping gently to eliminate air pockets.
Water deeply right after planting to settle the soil and eliminate air gaps. Privet needs 1 inch of water weekly during establishment (first 12 months), but let the top 2 inches of soil dry between waterings to prevent root rot. Mulch with 2-3 inches of shredded bark to conserve moisture and suppress weeds, but keep mulch 3 inches away from the trunk to prevent disease.
✂️ Step 3: Master Year-Round Pruning for Density
Spring is the prime time to shape privet hedges. Wait until after last frost when new growth begins—you'll see fresh green shoots emerging from the base. Cut back 1/3 of last year's growth to encourage bushier branching. I use clean, sharp pruners and make cuts at a 45-degree angle just above a leaf node to promote healing.
For year-round maintenance, light pruning every 4-6 weeks keeps growth compact. Summer pruning stimulates dense foliage, while late fall/winter cuts remove dead wood. Never remove more than 25% of the plant in one season—privet recovers slowly from heavy pruning. Watch for water sprouts (thin, vertical shoots) and prune them immediately to maintain a tidy shape.
☀️ Step 4: Maintain Soil and Light Conditions
Privet handles drought once established, but drought stress weakens foliage density. Water deeply every 10-14 days during dry spells, aiming for 1-1.5 inches total. Fertilize lightly in early spring with a balanced 10-10-10 formula—too much nitrogen encourages leaf growth over density. I spread 1/2 cup per plant and water it in immediately to prevent root burn.
Monitor light exposure—privet in full sun develops deeper green leaves, while partial shade produces softer growth. If leaves yellow between veins, it's a sign of too much shade. Thin out crowded branches annually in late winter to improve air circulation, which prevents fungal diseases like powdery mildew that can spot leaves and weaken growth.
Tips & tricks for perfect oval leaf privet cultivation
Here's what nobody tells you about transforming privet into a lush, impenetrable hedge—trust me, these details make all the difference.
Soil Preparation Secret: Before amending your soil with compost, conduct a simple pH test using a kit from your local garden center. Oval leaf privet thrives in the 6.0-7.5 range—if your soil tests lower than 6.0, add pelletized lime at a rate of 5 pounds per 100 square feet two months before planting. This adjustment prevents future yellowing and promotes vigorous root development. I've seen privet plants double in density within a single season after proper soil prep.
Root Ball Placement Technique: When positioning your privet in the planting hole, verify the top of the root ball sits exactly 1 inch below soil level by using a level tool or even a straight stick. This subtle elevation prevents stem rot while encouraging roots to expand outward rather than upward. After backfilling, press the soil gently with your hands—don't compact it with a shovel, as this creates air pockets that stunt root growth.
Pruning Timing Strategy: For maximum density, time your spring pruning to coincide with the appearance of new green shoots after last frost. These fresh growth points signal the plant's active growth phase, making it ideal for shaping. I mark my calendar for late April in most climates, but adjust based on your local frost dates. Remember: never prune when the plant is under stress from drought or extreme temperatures.
Watering Wisdom: The 1 inch weekly watering guideline during establishment applies to healthy soil conditions. In clay-heavy soils, increase to 1.5 inches because water pools at the surface rather than penetrating. Use a rain gauge or tuna can to measure accurately—eyeballing leads to either underwatering or root suffocation. Mulch with 2-3 inches of shredded bark immediately after planting to lock in moisture, but maintain that 3-inch clearance from the trunk to prevent disease.
Pro Tips for Oval Leaf Privet
- Here's what nobody tells you about transforming privet into a lush, impenetrable hedge—trust me, these details make a...
- Soil Preparation Secret: Before amending your soil with compost, conduct a simple pH test using a kit from your local...
- Root Ball Placement Technique: When positioning your privet in the planting hole, verify the top of the root ball sit...
Frequently asked questions
Got questions about oval leaf privet? You’re not alone!
This hardy shrub is a favorite for hedges and privacy screens, but even the pros have a few curiosities. Here are answers to the most common queries—so you can grow lush, pest-resistant foliage with confidence.
Is oval leaf privet invasive?
Oval leaf privet (Ligustrum ovalifolium) is not considered invasive in most U.S. regions, unlike its cousin, Ligustrum sinense. However, it can spread aggressively in warm climates (Zones 7–10) if left unchecked. Regular pruning and monitoring will keep it in bounds. Always check local regulations before planting!
When is the best time to prune oval leaf privet?
The golden window for pruning is late winter or early spring (just before new growth starts). For shaping or light maintenance, you can prune lightly in summer or fall, but avoid heavy cuts then—it may stimulate tender growth that’s vulnerable to frost. Pro tip: Never prune in deep winter (below 20°F), as it can stress the plant.
How do I prevent powdery mildew on my privet?
Powdery mildew thrives in shady, humid conditions—so improve airflow by thinning dense branches and pruning to let sunlight reach the center. Water at the base (not overhead) and avoid overhead irrigation. If mildew appears, treat with neem oil or a fungicide like copper soap. Prevention is key: Space plants 3–5 feet apart for better circulation.
Can I grow oval leaf privet in containers?
Oval leaf privet thrives in large containers (at least 18–24 inches wide) with well-draining soil. Use a mix of potting soil + perlite to prevent root rot. Choose a pot with drainage holes and move it indoors (to a bright, cool spot) if temps drop below 10°F. Bonus: Container privet is perfect for patios or small yards!
What pests should I watch for on oval leaf privet?
The most common pests are aphids, spider mites, and scale insects. Early signs: Sticky leaves (aphids), fine webbing (mites), or white bumps (scale). Blast pests off with water or use insecticidal soap for mild infestations. For severe cases, try horticultural oil. Healthy plants resist pests better—so fertilize lightly in spring and keep it well-watered!
What’s a good alternative if I want a non-invasive hedge?
If you love privet’s look but want lower-maintenance options, try:
- Boxwood (Buxus) – Dense, evergreen, and pest-resistant (but slower-growing).
- Holly (Ilex) – Spiny leaves deter pests and animals; great for year-round structure.
- Abelia (Abelia x grandiflora) – Fast-growing, fragrant, and handles pruning well.
- Dwarf Fothergilla (Fothergilla gardenii) – Native, disease-resistant, and stunning fall color.
Each has unique care needs, so pick based on your climate and sunlight!
Wrapping up and next steps
Mastering the art of year-round pruning for your oval leaf privet is all about patience and precision—rewarding you with lush, dense foliage that’s the envy of the neighborhood! 🌿 Whether you’re trimming for shape, health, or pest prevention, the key is consistency and the right techniques.
Now that you’re armed with expert tips and troubleshooting advice, it’s time to roll up your sleeves and give your privet the TLC it deserves.
Ready to take the next step? Start small:
- Pick a sunny day and grab your shears—your privet’s transformation begins now!
- Keep a pruning journal to track progress and adjust your strategy as needed.
- Join a local gardening group for real-time feedback and inspiration.